General d’Armee in 28mm (Or Charge Plays Napoleonics and Likes It)
I’ve never really been excited about playing big-battle Napoleonics.
To be clear, I have no problem with the period. I enjoy Sharpe as much as any full-blooded Yorkshireman is required to, and I can be suitably wowed by a large-scale display of massed ranks on the field of battle (I’m not an unfeeling monster after all). The problem I have is three-fold. One, I don’t want to paint that many troops. Two, my knowledge of the period tactics and strategies isn’t anywhere close to things post the invention of bolt action rifles leaving me with the instinctive knowledge of what I should be doing at any one time. Finally, and most controversially, most of the black powder era games I’ve played have been boring as sin – all those pretty units sitting and doing not much aside from rolling dice to remove a figure or two, moving blocks of troops performing mad combat geometry until one side breaks and falls back or the pub kicks us out for having been shouting about rules.
Now, there are a few exceptions to the last point. Dropping down to a semi-RPG level I’m a big fan of Forager, appealing to the Sharpe fan in me that likes seeing individuals running around and committing daring do. One level up, and knowing that I’m a Lardy fan, it will shock you to hear I actually really enjoy Sharp Practise – the forces are a reasonable size, combat resolves at a relatively fast pace and the activation system always keeps you on your toes. Both of these games deliver the narrative tendrils that grab me when it comes to wargaming, something I find lacking when I’ve played larger games as it’s buried away.
All this said, there is still lots of time I lay awake at night and wonder. I wonder if maybe I could learn to enjoy the large-scale warfare of the era, with visions of geometric shapes of troops flying colours forming up and wreathed in smoke as a camera flies overhead.
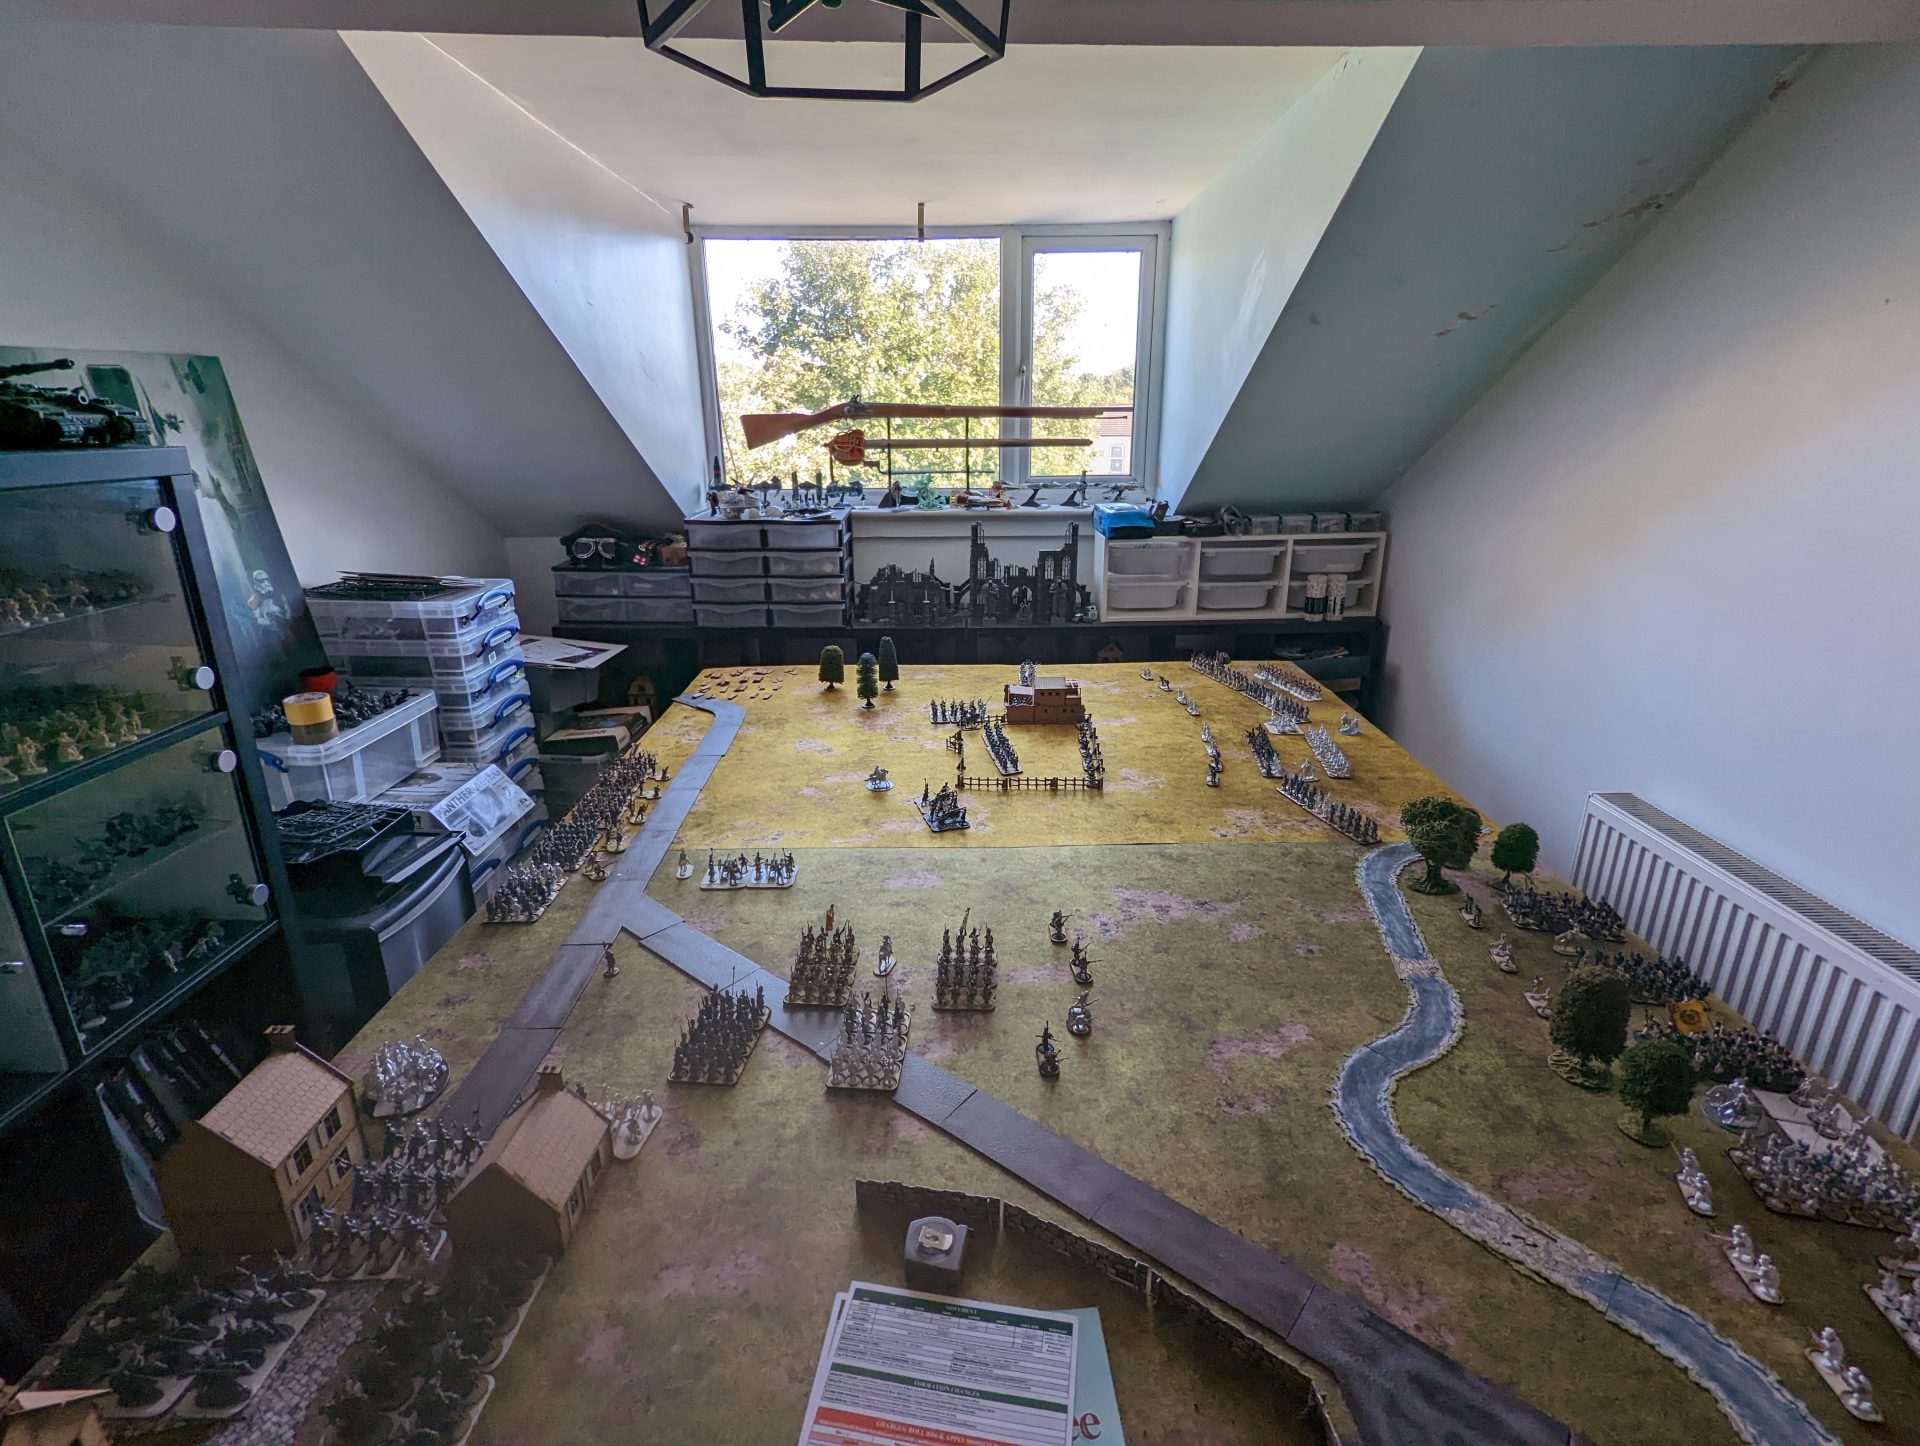
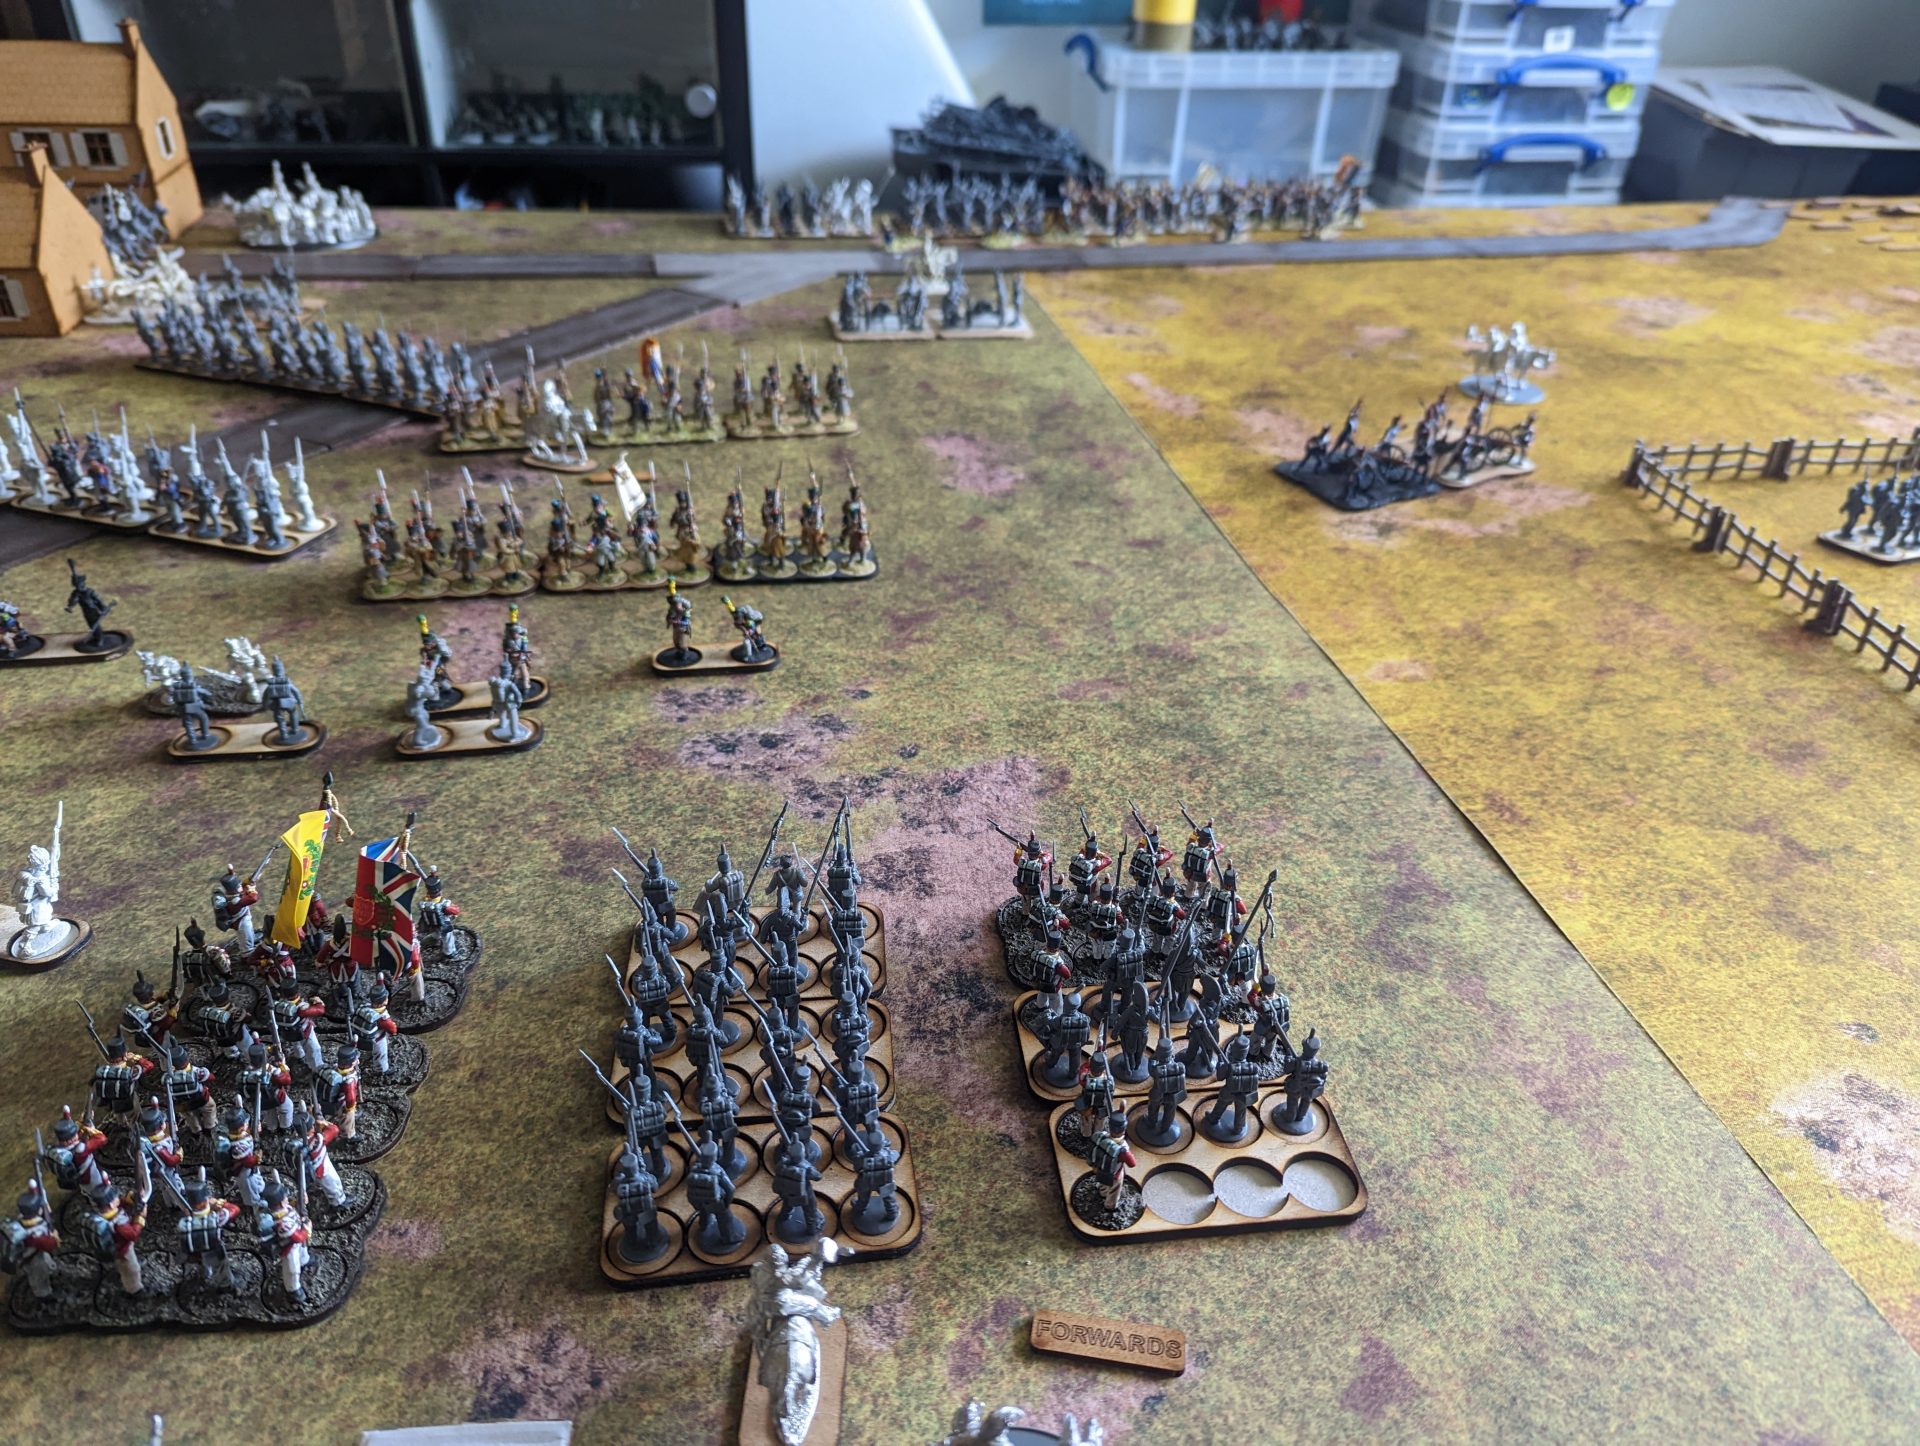
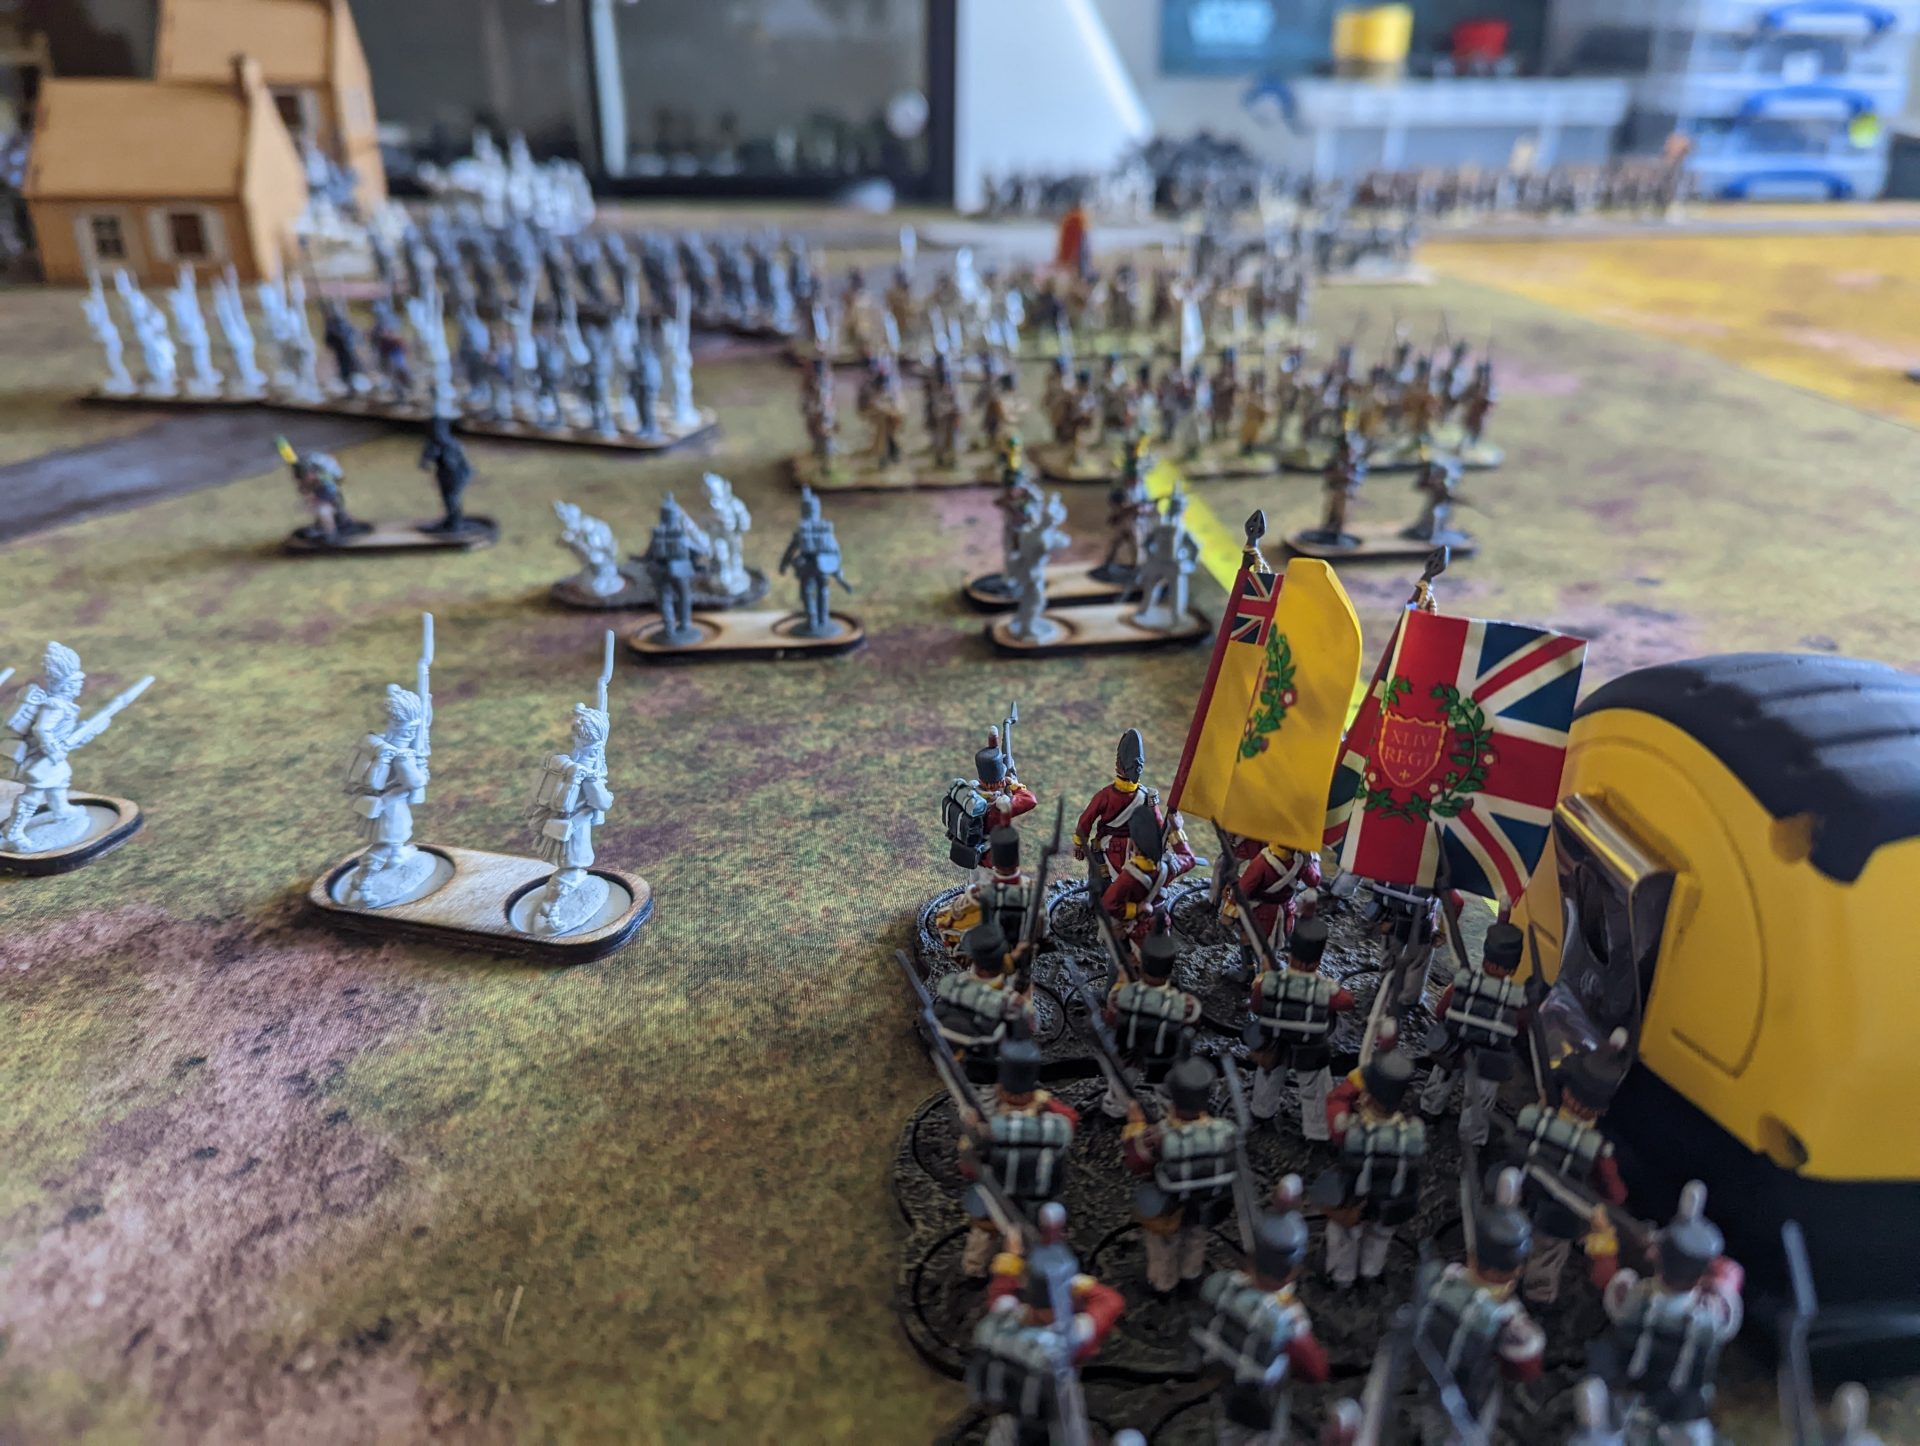
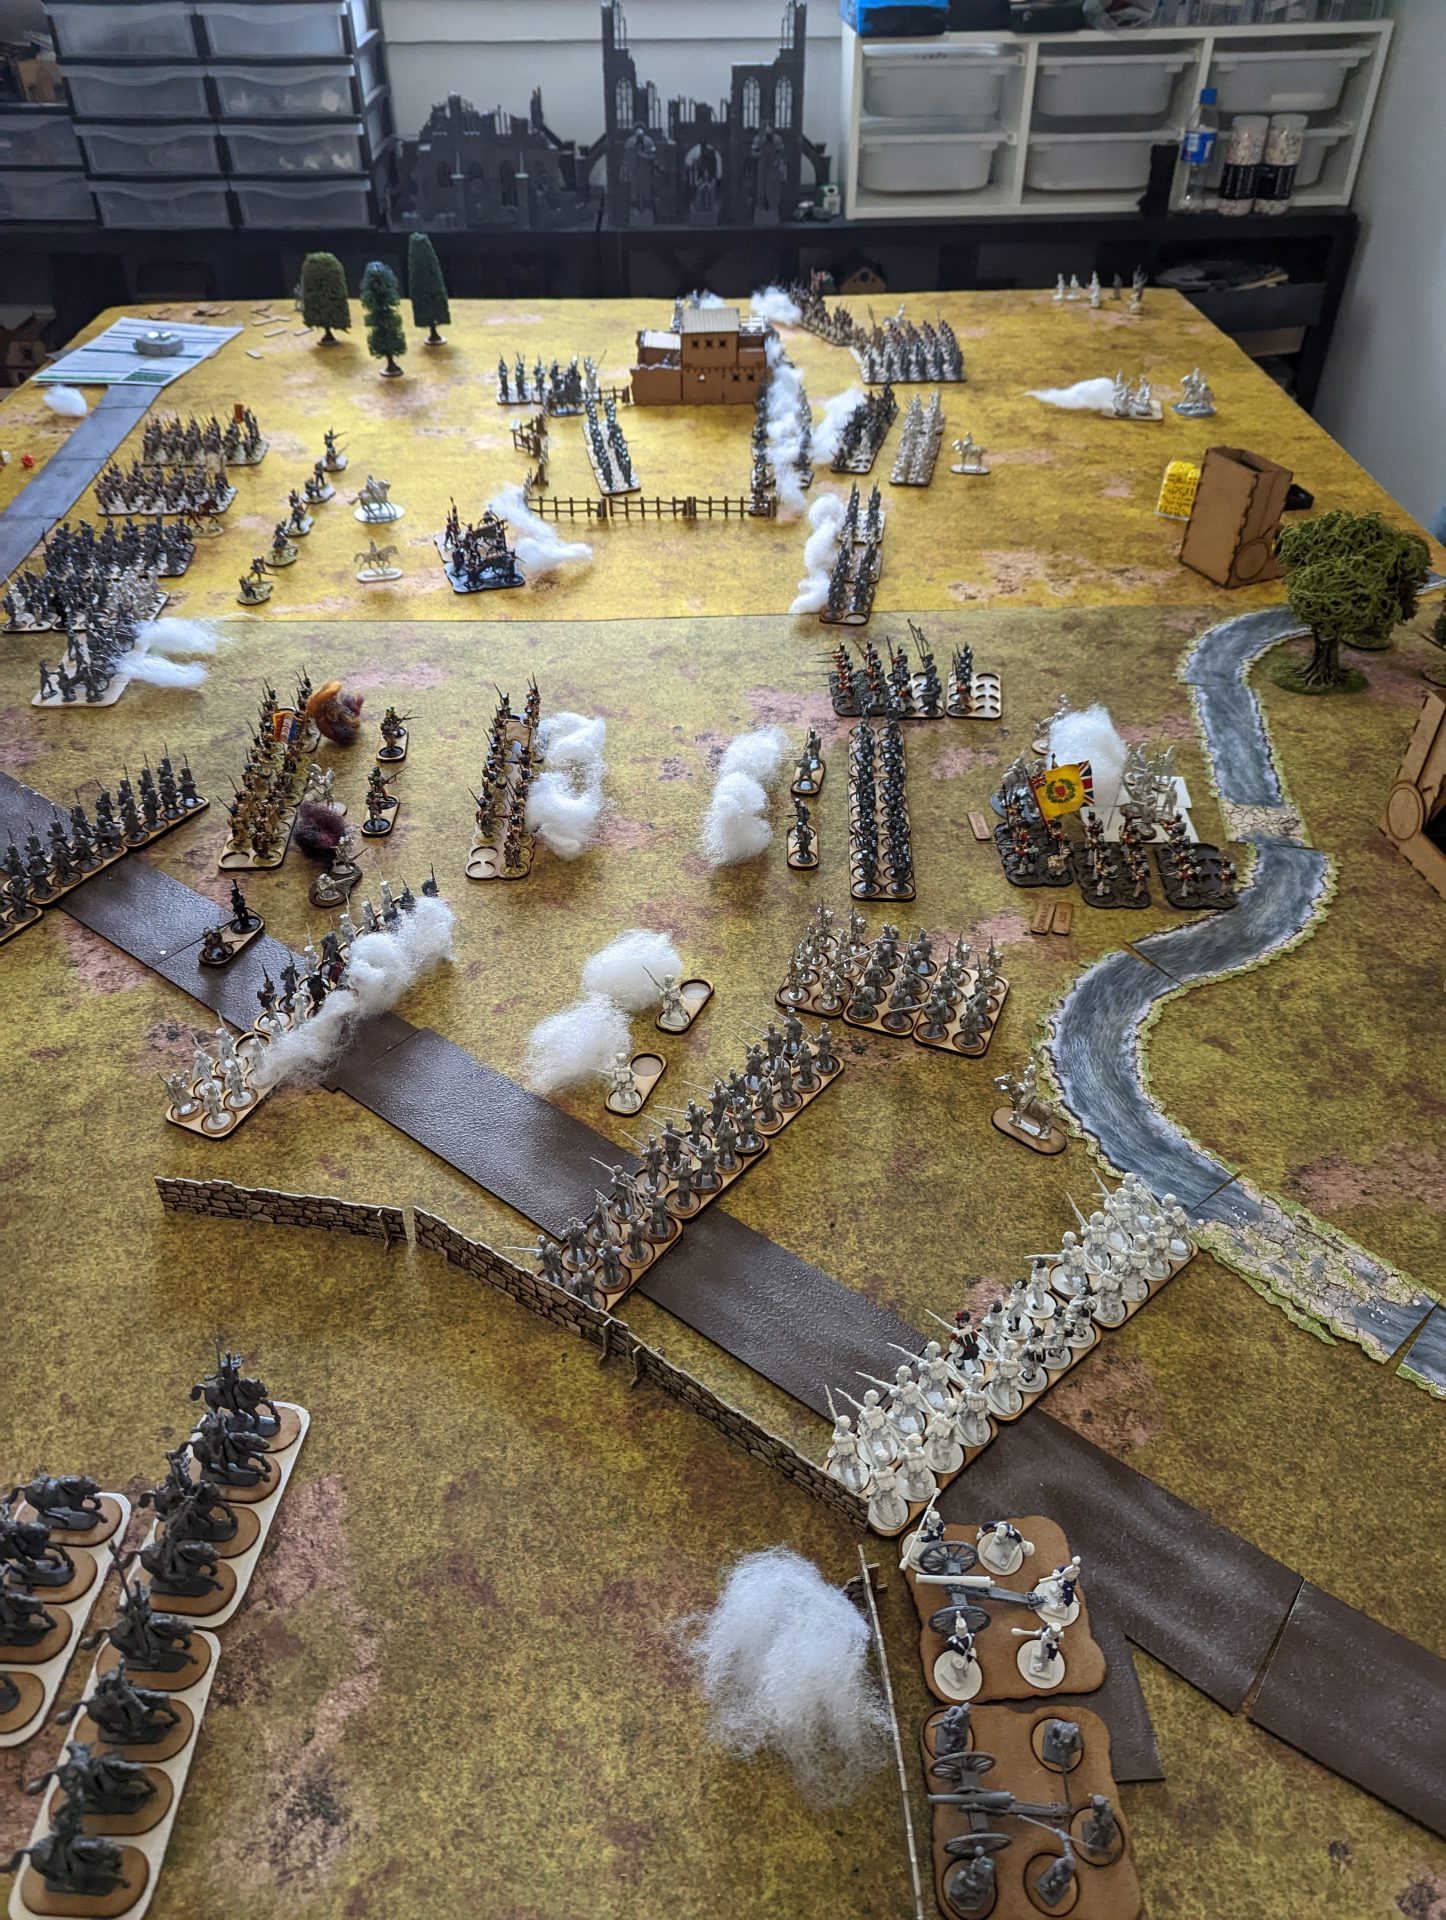
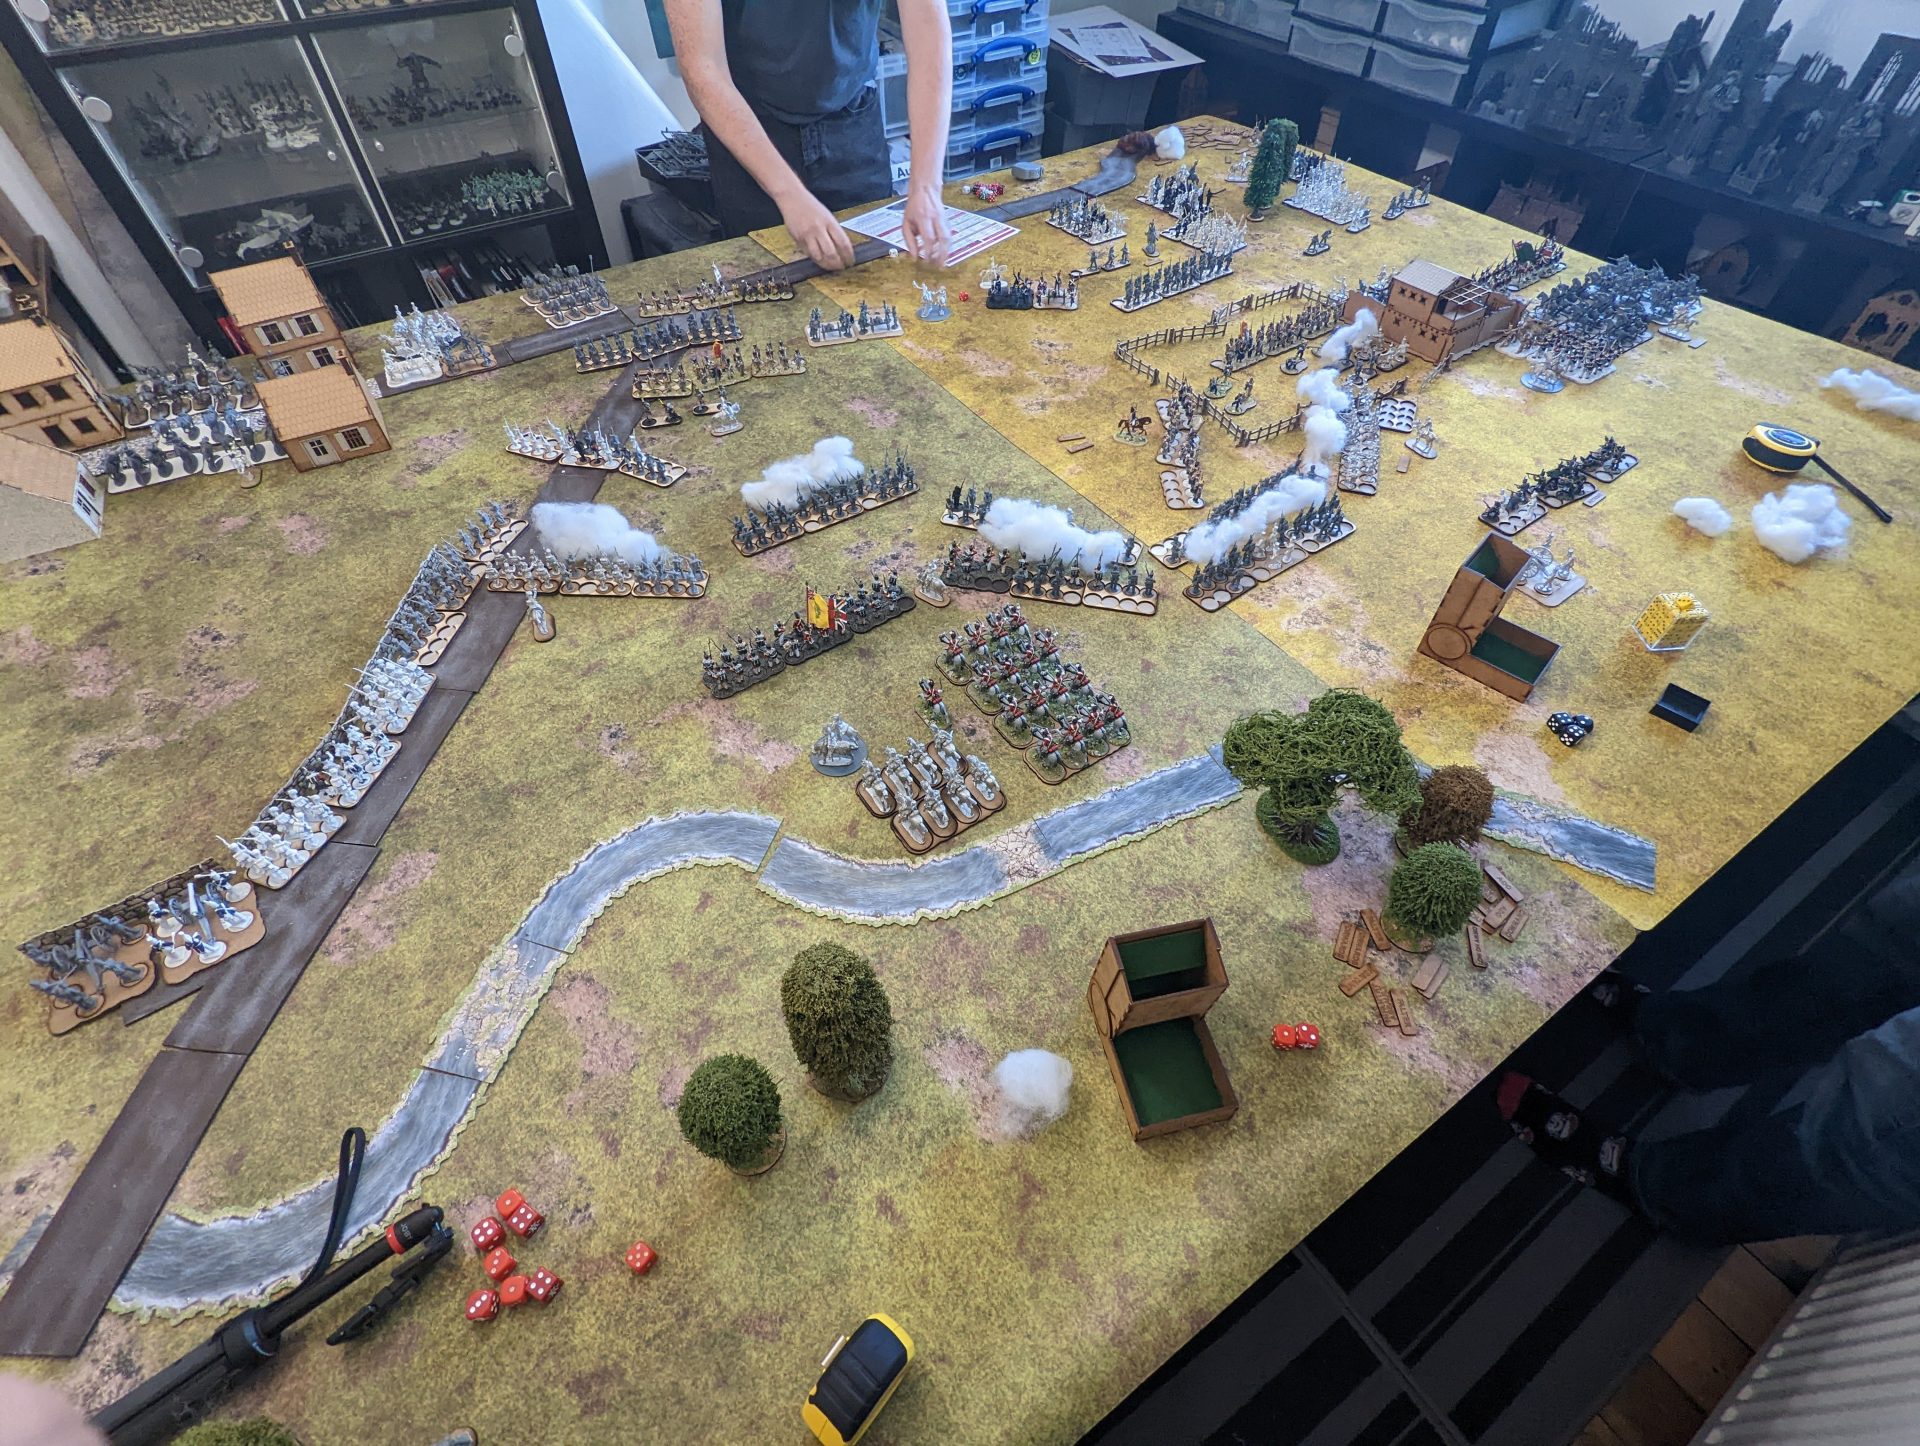
Enter the Creative Regular Opponent and his rather wonderful gaming room in his new house (as seen in Operation Carronade earlier this year). To put it mildly, the man is mad. He has been building up a Napoleonic collection to let him play pretty much anything using 28mm figures, grabbing from a range of manufacturers such as Victrix and Perry on the plus, with some less impressed noises when talking about Warlord. While arranging a games day to collect a certain new toy, the idea of playing General d’Armee with 28mm figures came up. This year I’ve decided to try out some new things and so agreed. There was also a check to say if we were okay to play using (gasp) unpainted figures but seeing as the host is the one arranging the game and setting out a great table for it, frankly, I’d play with MDF pieces with “REDCOAT” on the top. That said, 28mm IS my favourite scale, so even though the concept of 28mm Division Level sounds like someone has too much space to play with, we thoroughly agreed. Each individual is roughly 30 people and man it delivers a pretty great effect on the 8ft x 6ft board.
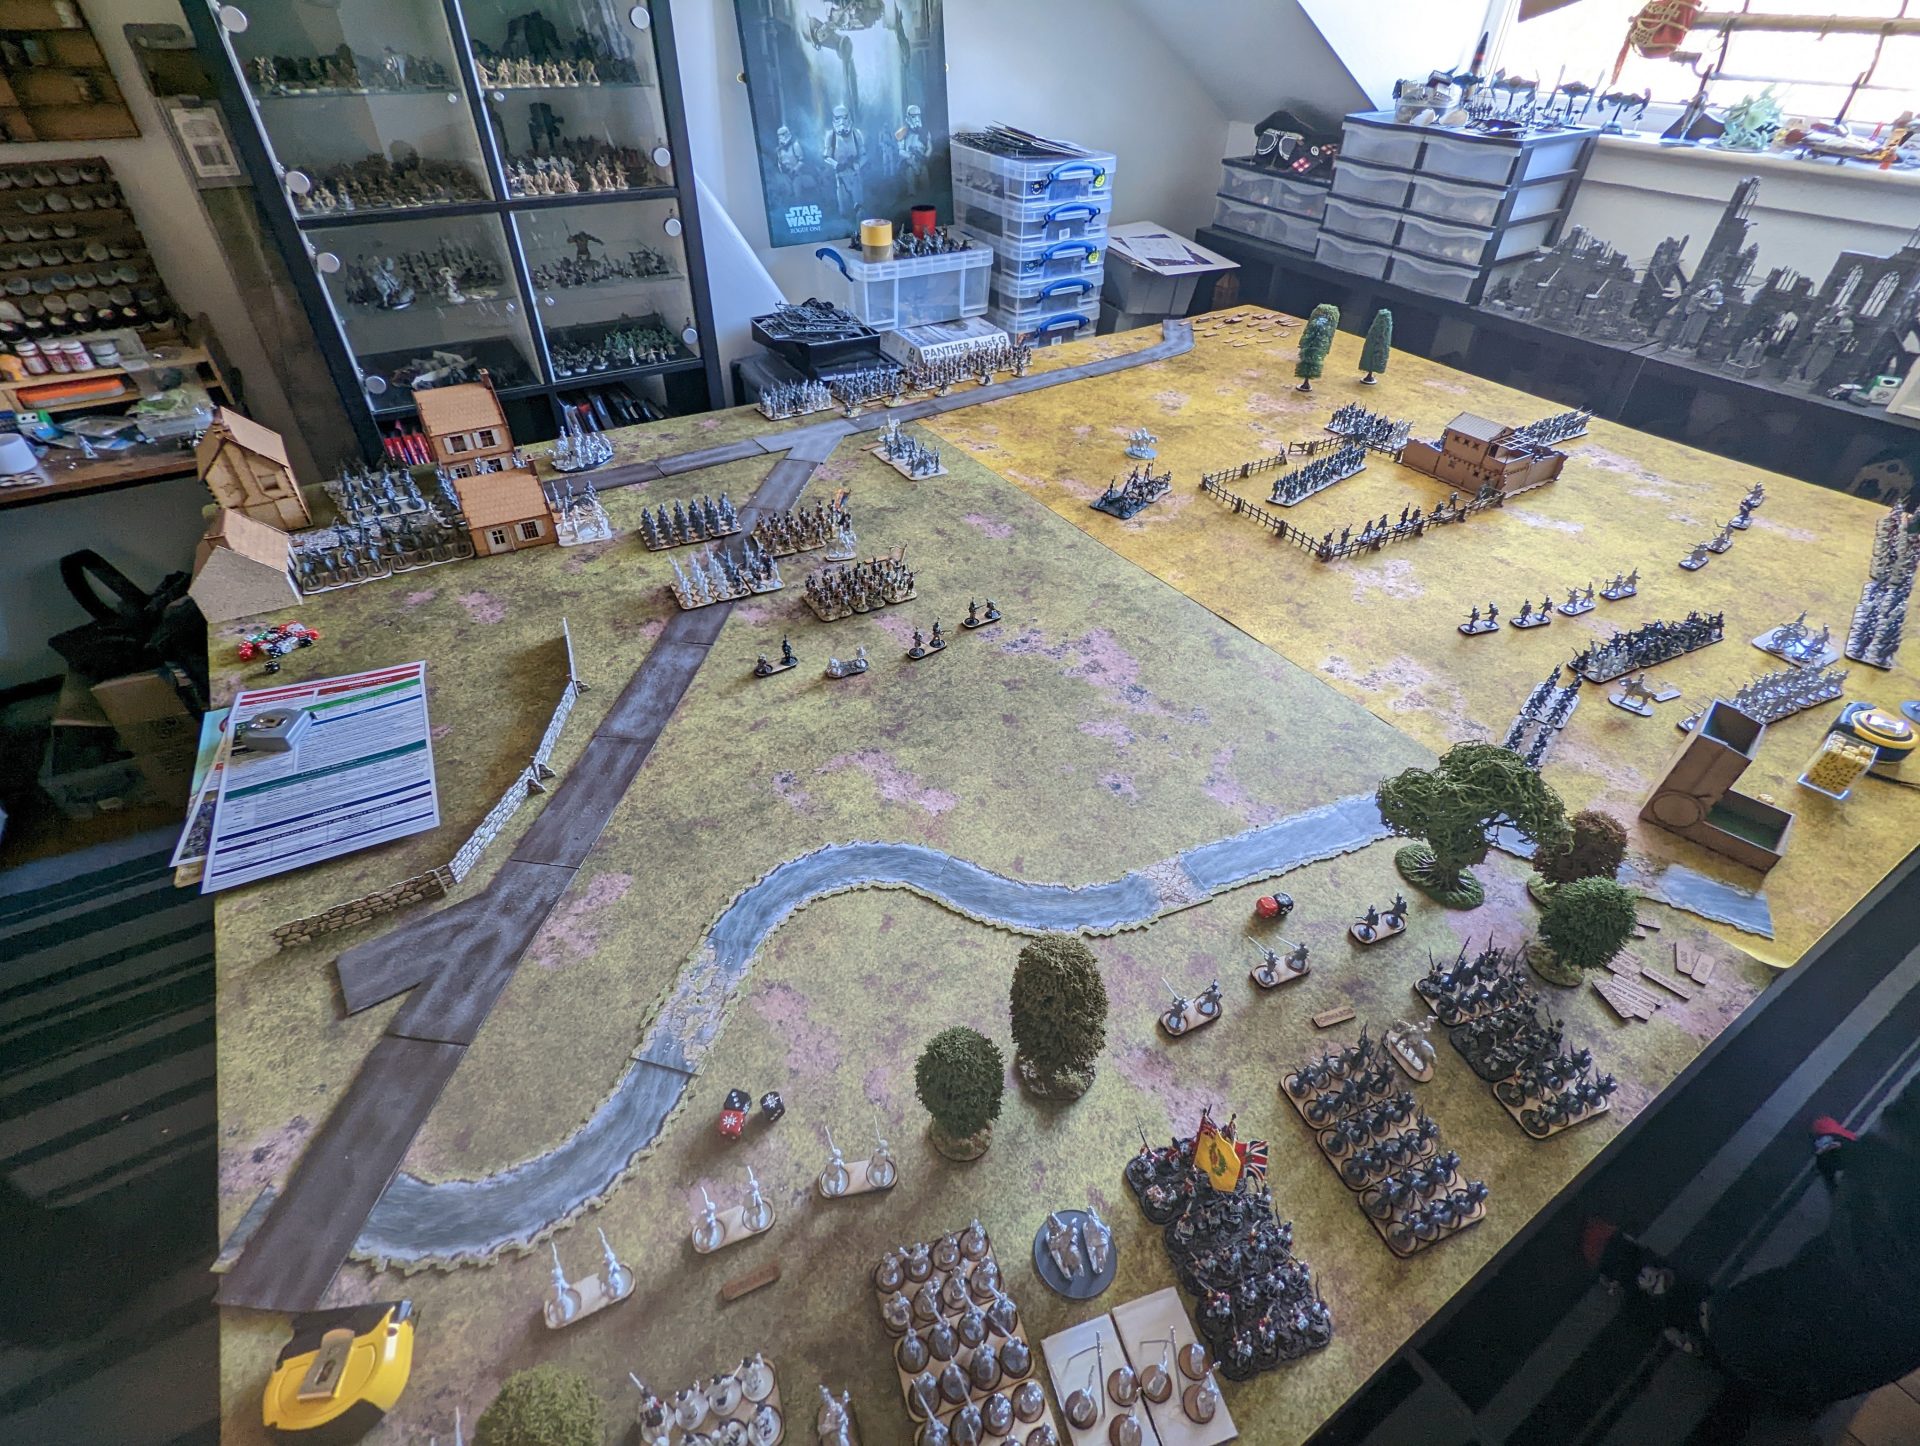
Stepping back in time, we found ourselves at the Battle of Vitoria in June 1813. After the tumultuous year of 1812 (that saw the Allies capture and then lose most of Spain as well as Napoleon’s little mistake), 1813 saw the Allies return to Spain, attacking a force much reduced due to the French reallocating forces throughout the Empire. While Marshall Jourdan and Prince Joseph retreat, pursued by Wellington, a local peasant has allowed the British to get into a position to hit the French where they least expect it. As the French march to where they think the main battle will come, out of the woods come two Allied Divisions.
(I am merely paraphrasing the briefing here – our host prepared a long introduction including all the scene settings, as well as continuing the tradition of pointing out potential clues of the horrible things that might suddenly appear from off-board mid-game).
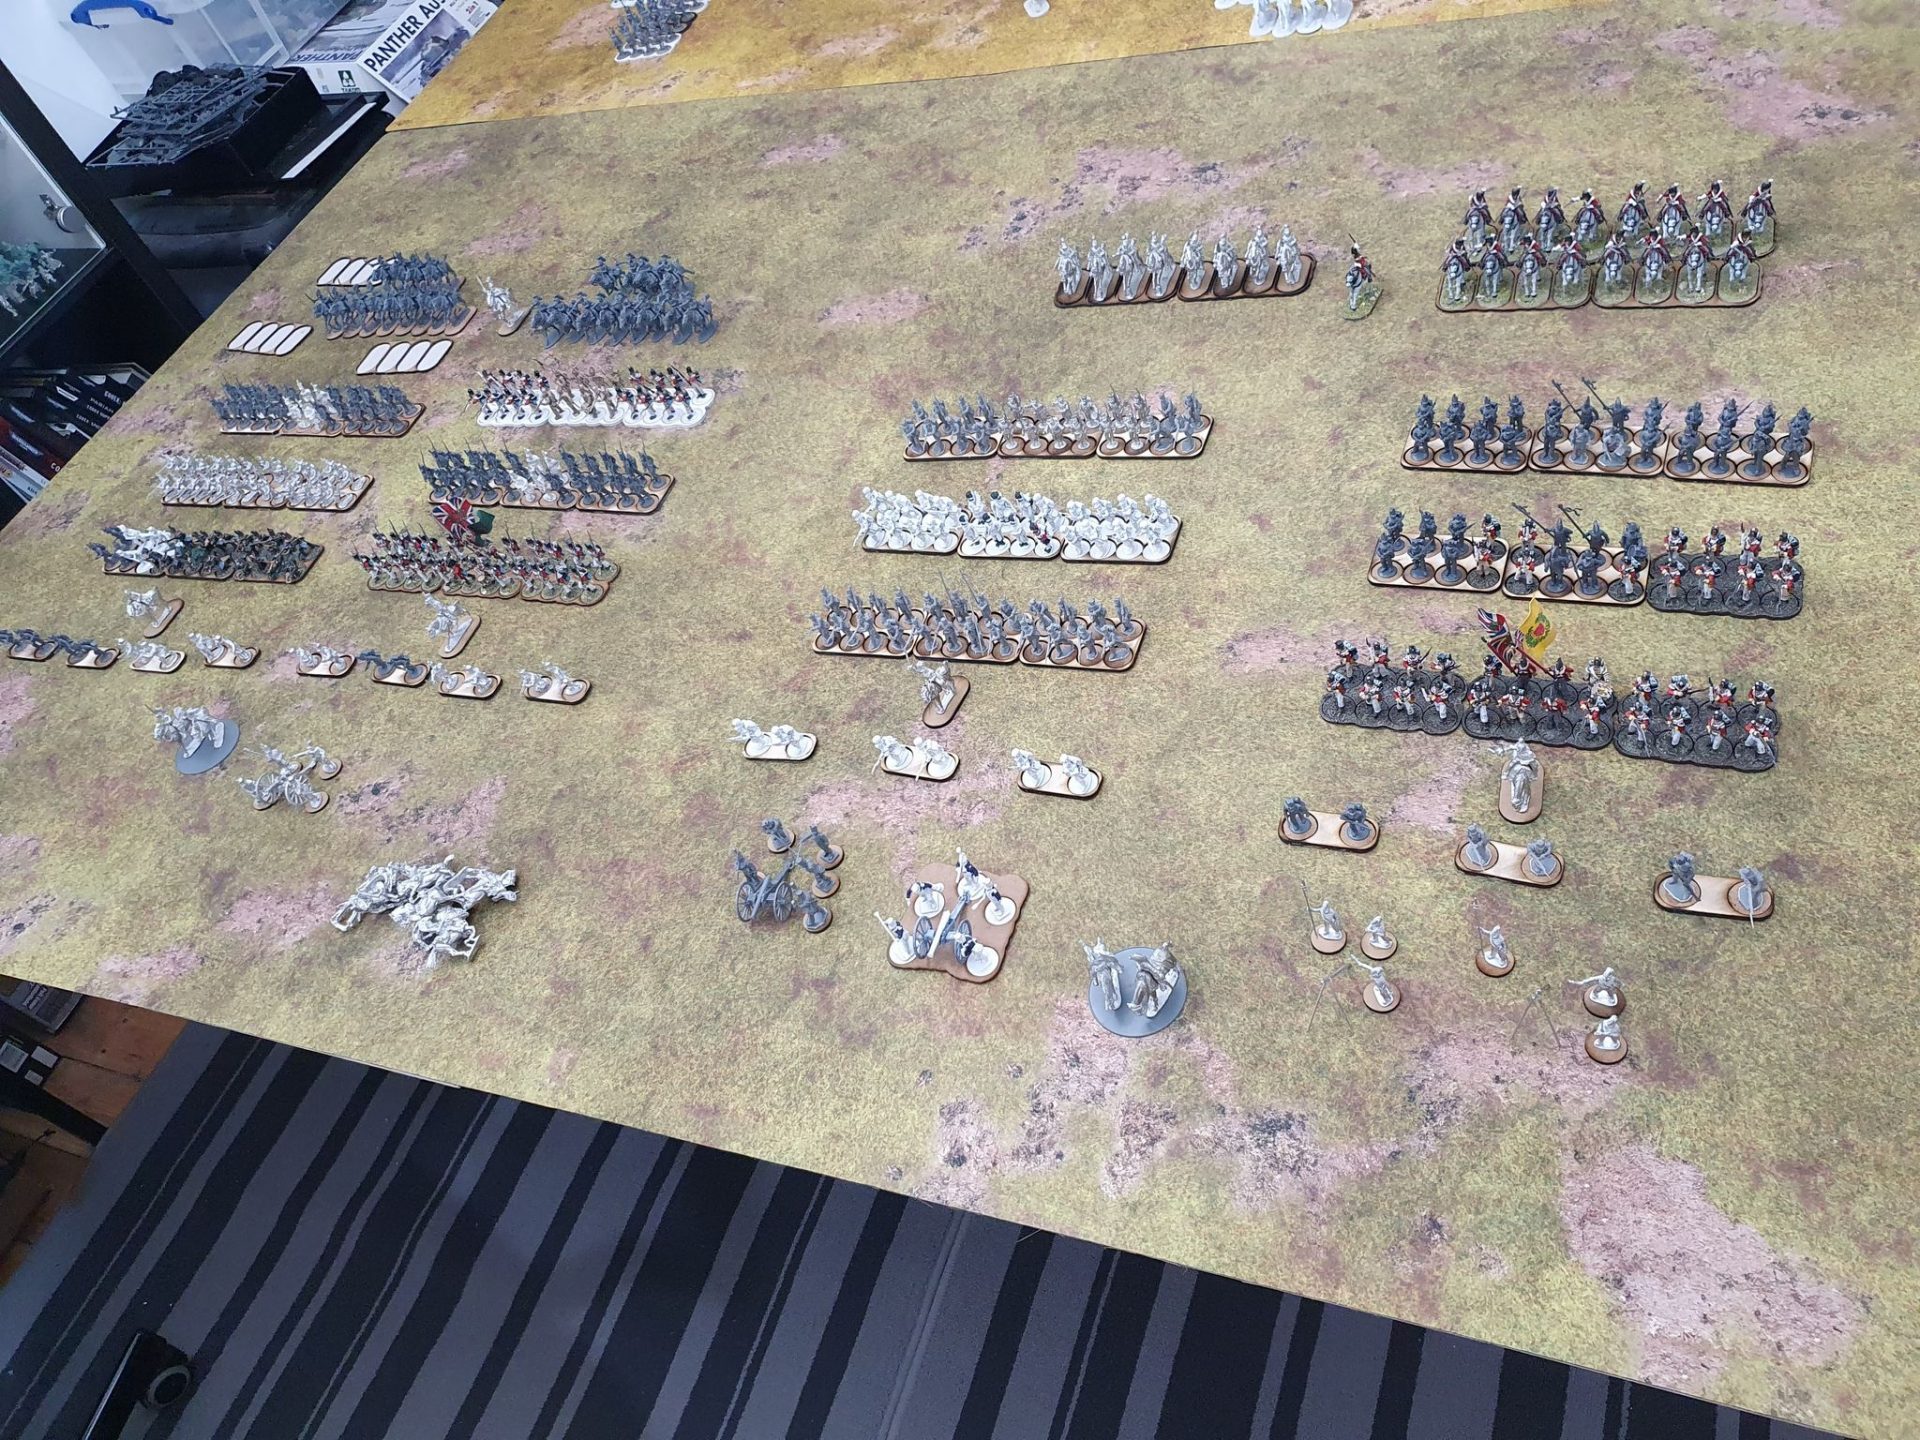
My Dastardly Regular Opponent Semi-Regular Ally and I found ourselves as the advancing Allies, with myself taking on the role of Picton and the 3rd Division while my compatriot took the role of Kempt and commanded the Light Division. In terms of the rules, we both had two brigades each, each comprising three battalions of infantry (a mix of elite and veteran troops) and their skirmishers, as well as a battery of artillery attached to each battalion (one of mine including a rocket team ready to rain down hell). We also had some cavalry reinforcements available for each of us, giving me access to the heavy cavalry while my ally (being the light division) took the light cav.

Against us, we had… god, just so many French. Enough French that when the game ended, there were unused trays of French waiting to be deployed. I’ll probably cover the basics of them as we go along, but the main thing was that the level of experience among the troops varied wildly with most of the battalions being a mix of recruits and regular infantry- after all, these are the leftovers once Napoleon pulled off the cream of the crop to go to the Battle of Leipzig. However, there are still some nasty surprises among them, including Polish Lancers, Elite and Veteran infantry and, naturally, multiple batteries of artillery because, Napoleonic French, artillery is kind of their thing.
With the first turn activation and enough adjutants running around giving out orders, I gave everyone Forward commands to get them moving. 3D6″ + 9″ of movement for infantry in column is handy, meaning I was able to surge across the river and start advancing on the first French Division.
As my columns pushed forward, I received the first taste of Napoleon’s favourite toys. Luckily out of range for anything too nasty (we’d see the effect of canister shots later), but even so the first barrage caused three casualties to the battalion on the right.
In the following turn, and seeing the troops in front of me were low-level recruits, I decided to charge into melee. With the Elite Connaught Rangers pushing forward, I assumed I’d simply overrun the force in front of me before I formed up into gunline to give it to the fellows behind them.
And this is where I had my rude awakening as to how little I knew about Napoleonics as the dice gods laughed at my hubris. Following some awful rolling, the recruits managed to push back the Rangers, causing 5 casualties and a sense of disorder to come over the troops.
What I should have done is moved into position and unleashed the British volley into them before attempting any sort of melee. Units in General D’Armee have a chance to respond to any charges before they hit home, with the casualties caused often leading to more issues among the attackers. Sometimes it’s a pretty standard “attacker loses cohesion and falls back” but other times it might even cause the attackers to halt and fire uncontrollably until their officers bring them back into control.
Worse, the French artillery fired again. Luckily for me, it only resulted in the brigade becoming disorganised, requiring it to recover in the next turn. However, not a great showing for the supposedly veteran British troops.
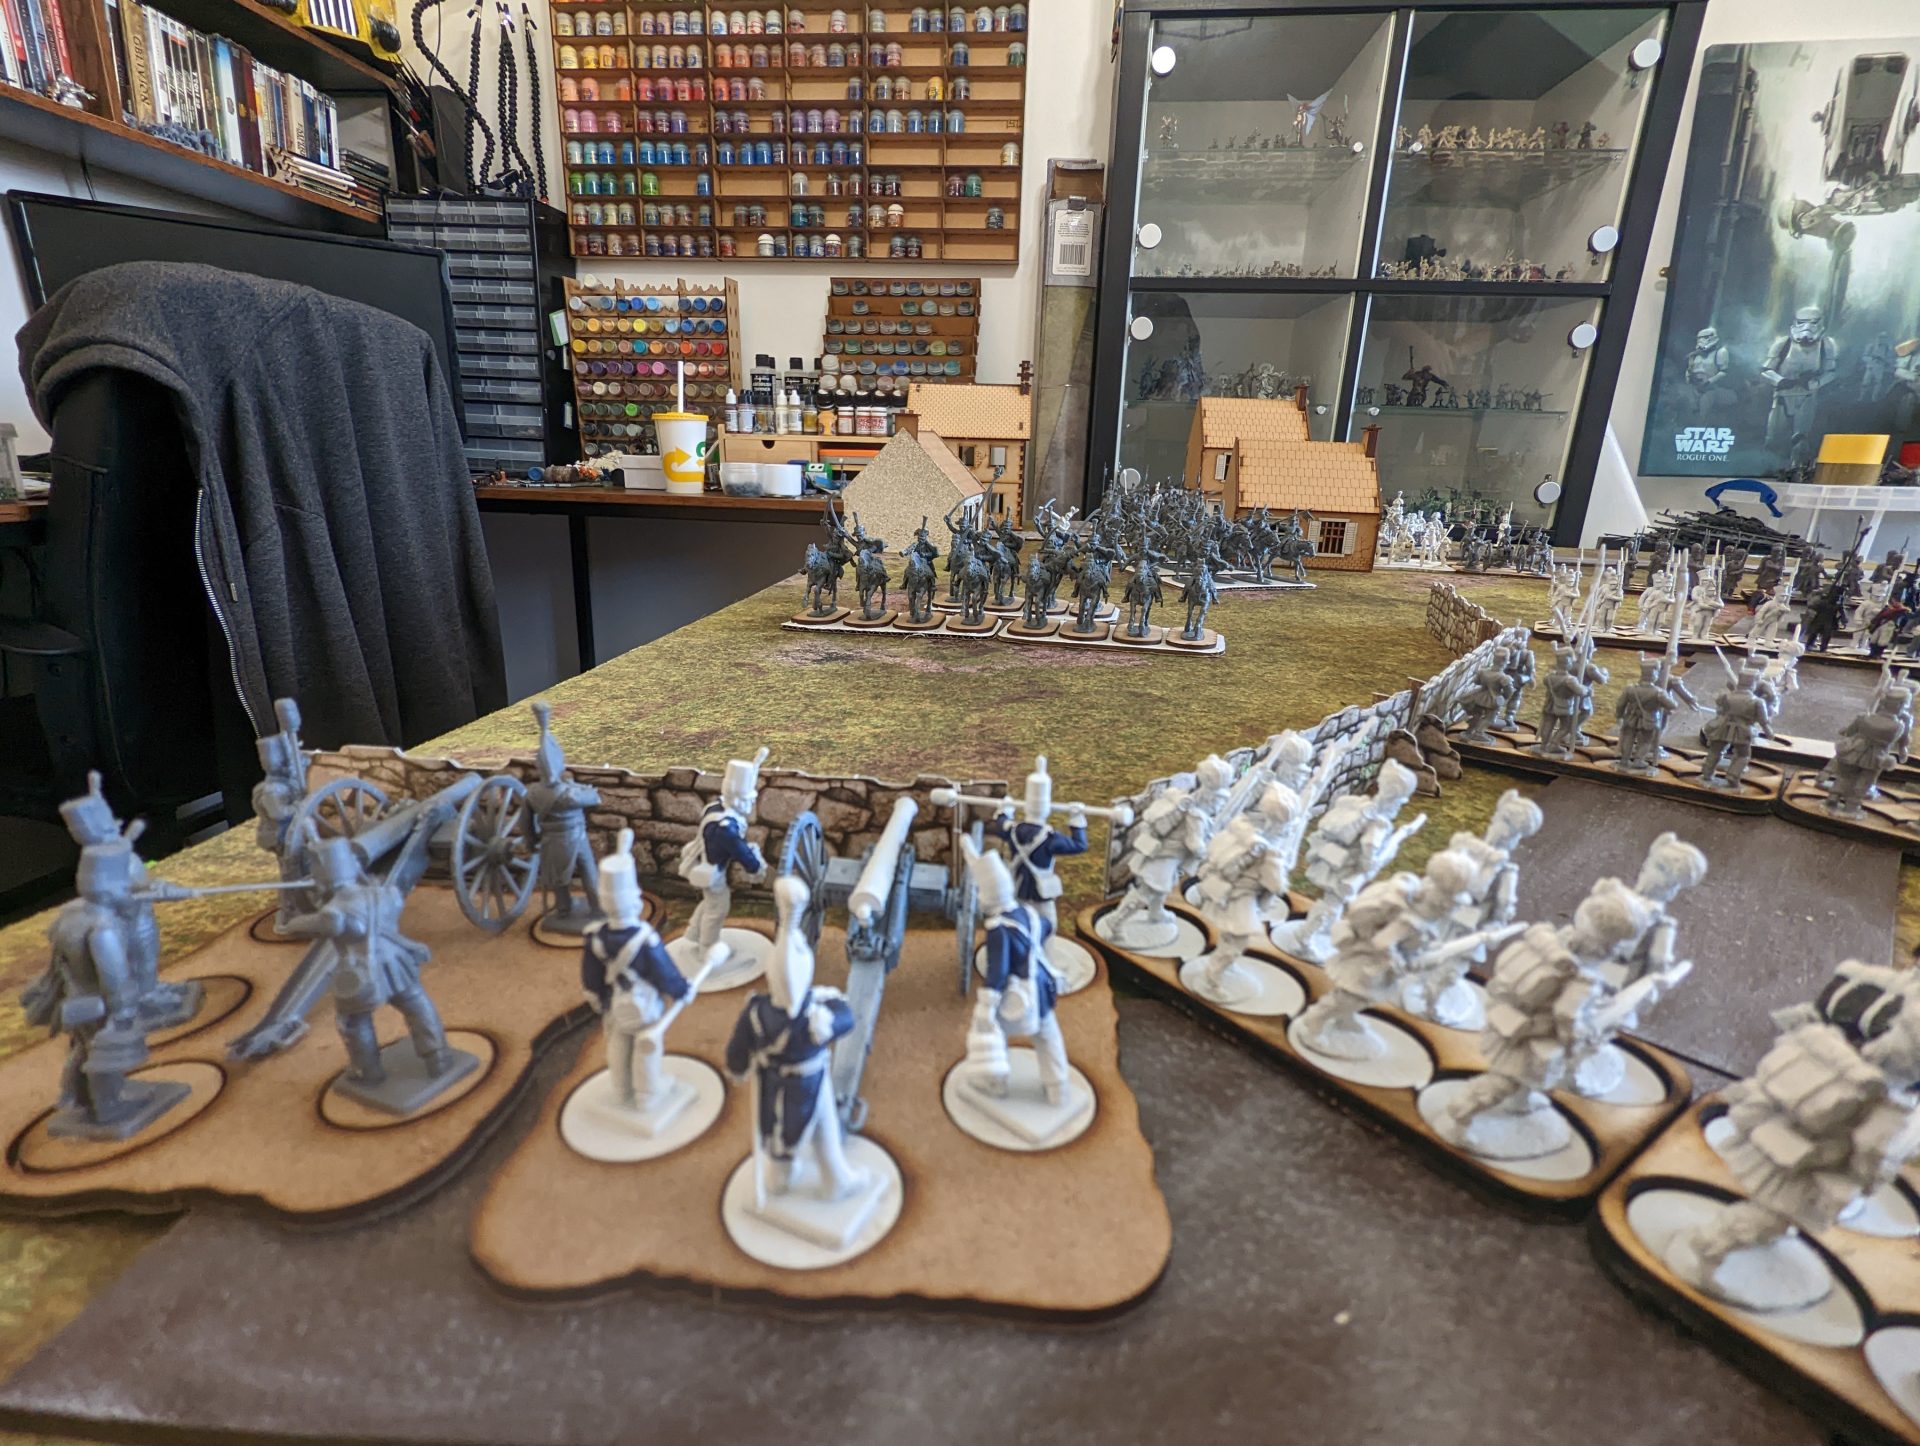
On the left side, I had identified the village (my objective) and the field in front of it as a perfect ground for the sudden appearance of cavalry. To counter this, I used the wall alongside the road as a screen, while also setting up my cannon to cover the approach. And just in time as the French cavalry came screaming towards me.
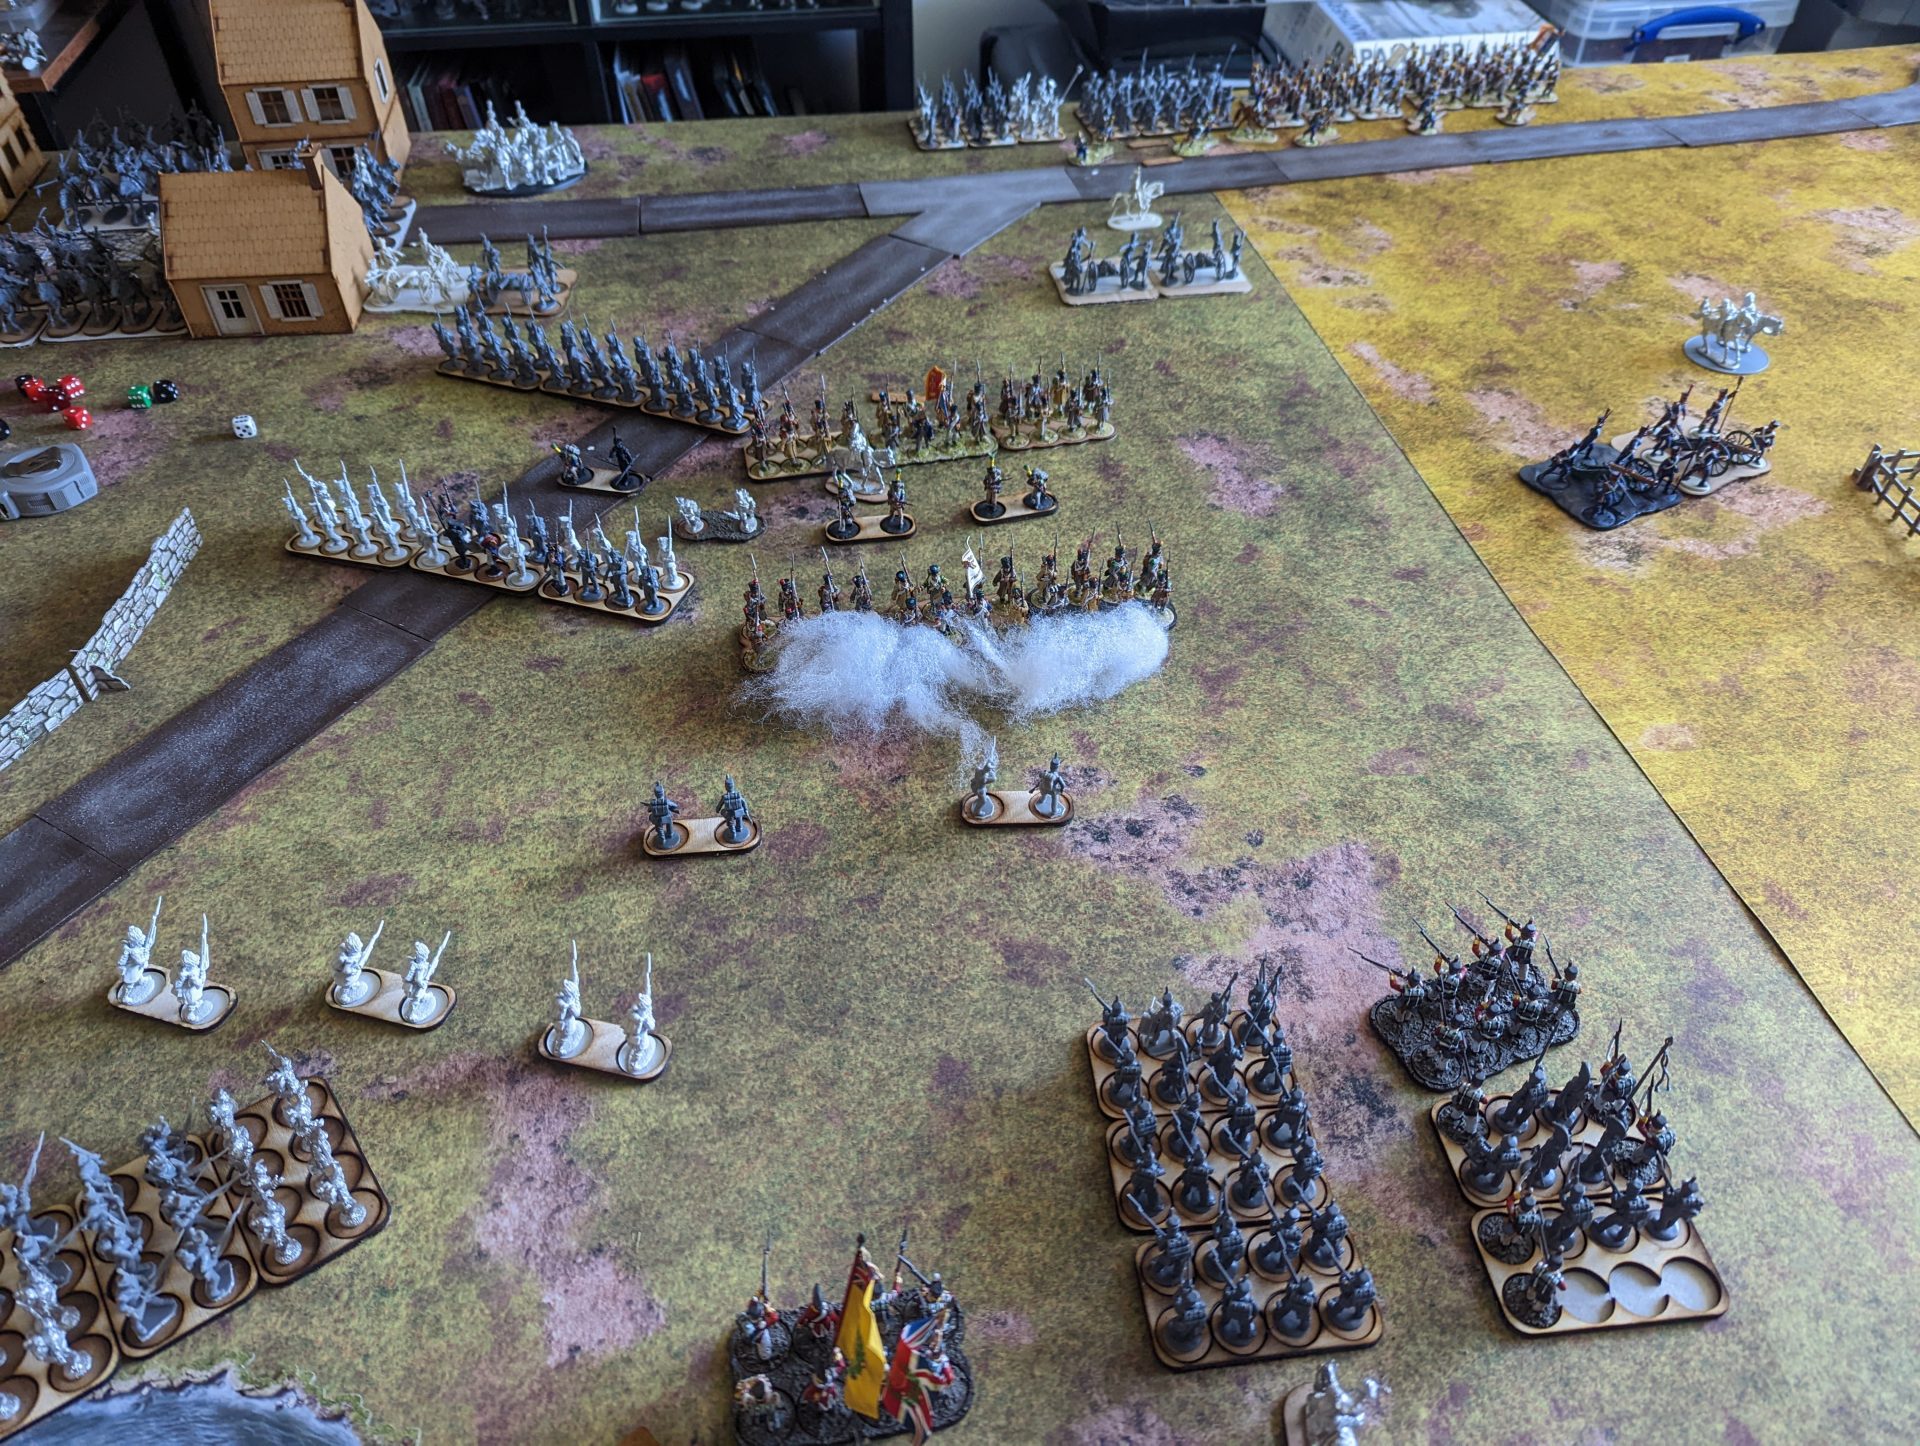
Speaking of screaming, the next turn saw plenty of it. While Picton spent his time angrily getting the mauled Batallion together, the Congreve rockets finally fired their first barrage. Targetting the mass of humanity in front of me (in particularly the regulars behind the recruits I had just attempted the charge), I rolled 2D6 to see the result. In this case, success for me! The rockets screamed in, causing havoc among the formed-up French unused to such rocketry.
Elsewhere, the shooting got underway across the entire left flank. Cannon fired on the charging horses (causing mass casualties due to close range) while the skirmish screens opened up on the blocks of troops advancing towards them.
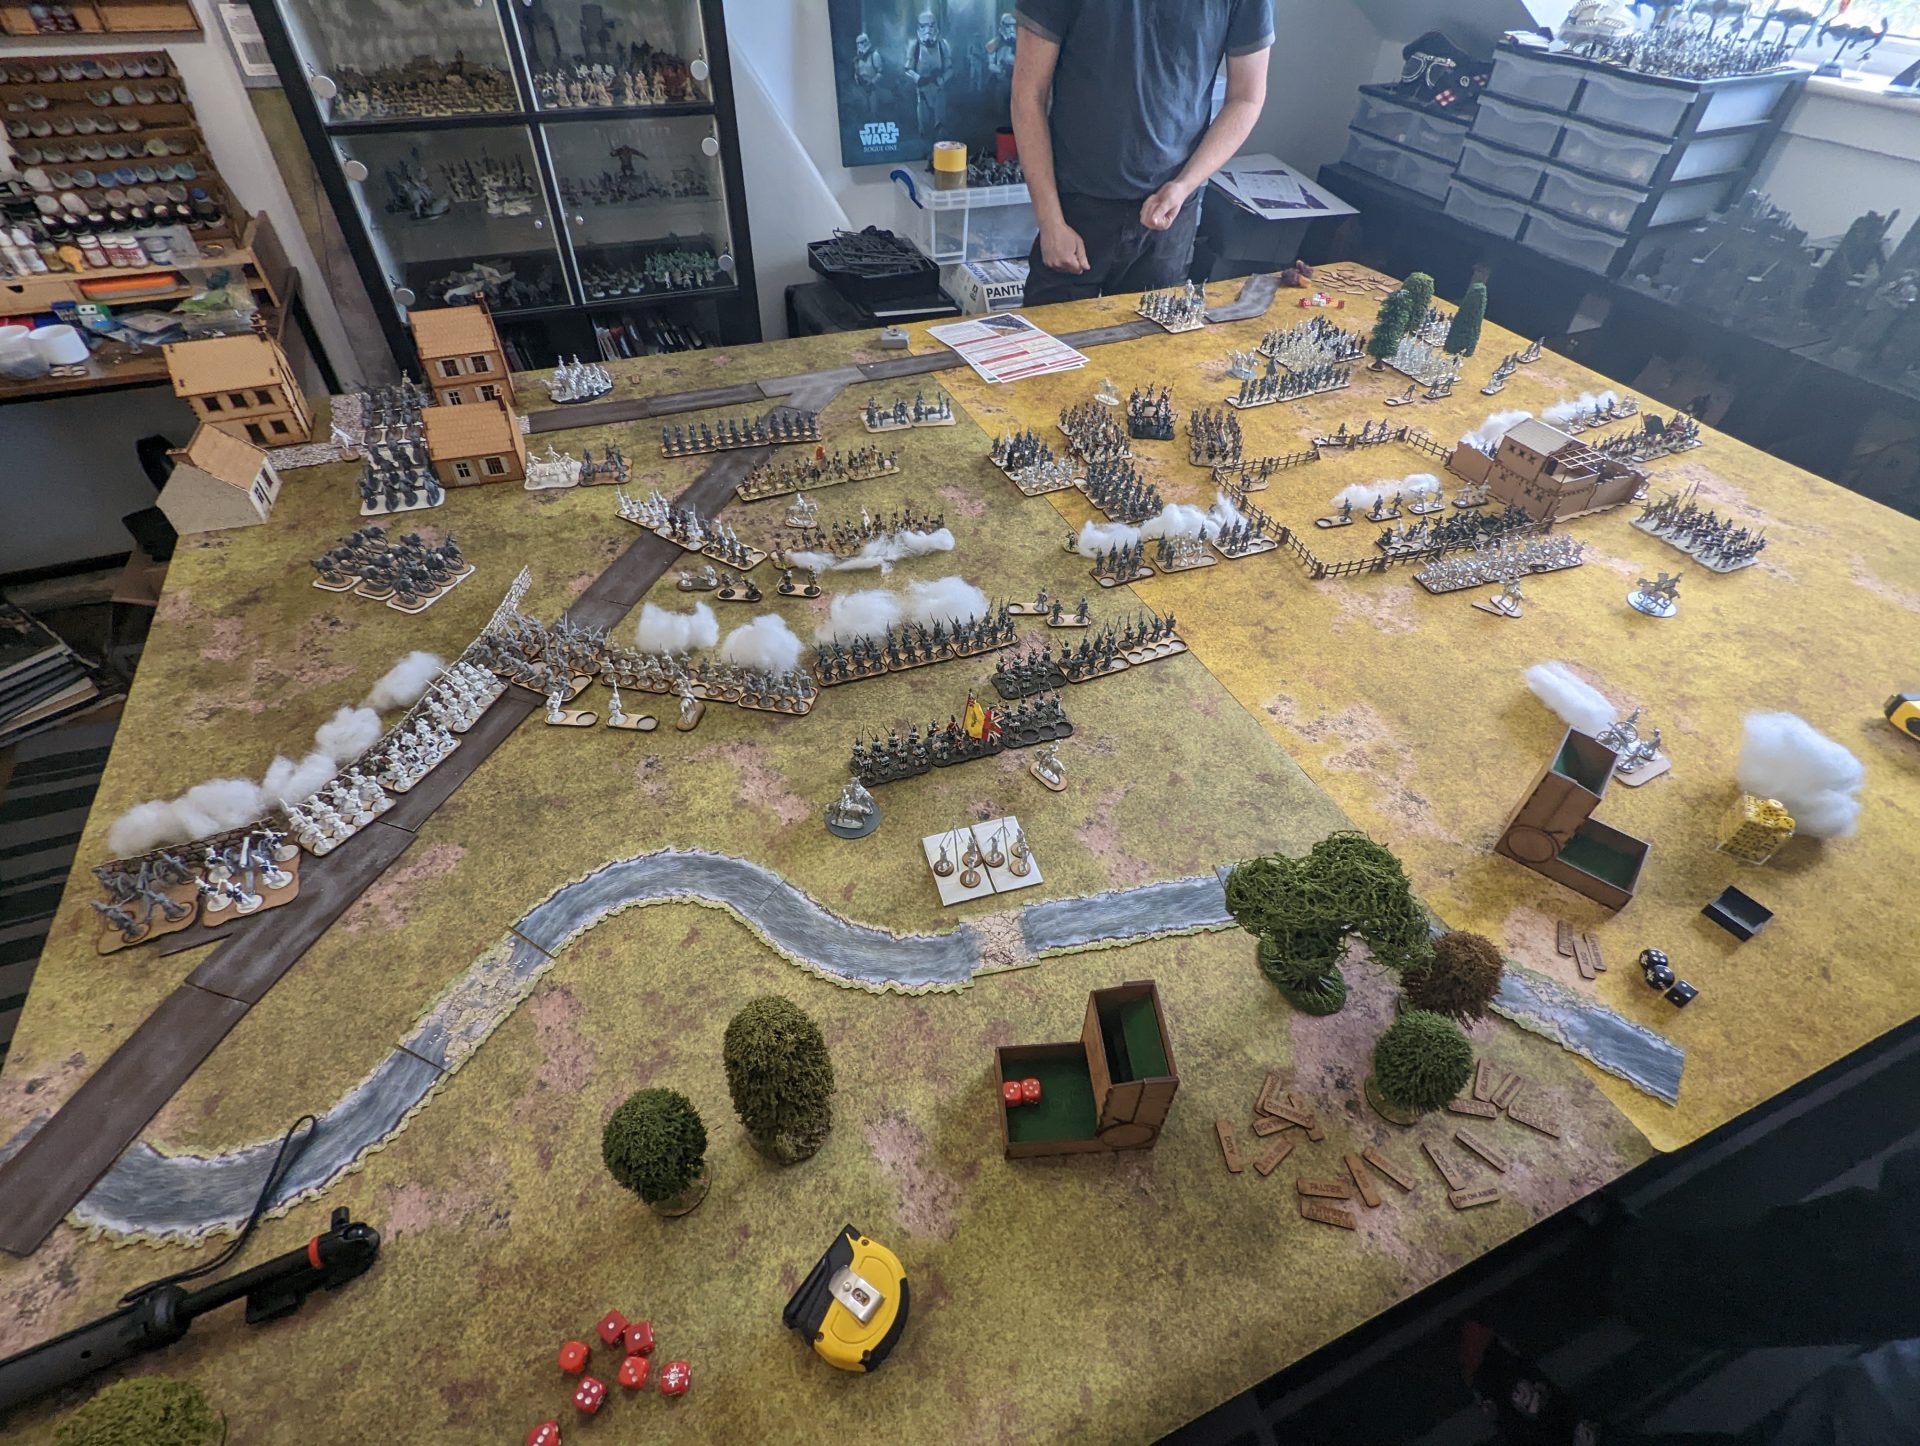
At this point, we must also detail what the light division was getting up to. Assaulting the villa complex (due to us playing in 28mm, that single building was more likely a villa, its outbuildings and its surrounding area), the 95th Rifles and their Portuguese allies found themselves skirmishing through the outskirts while Light Infantry (with cannon firing overhead) pushed in to overwhelm the structure itself (thanks in part to the use of ADCs firing “Infantry Assault” orders).
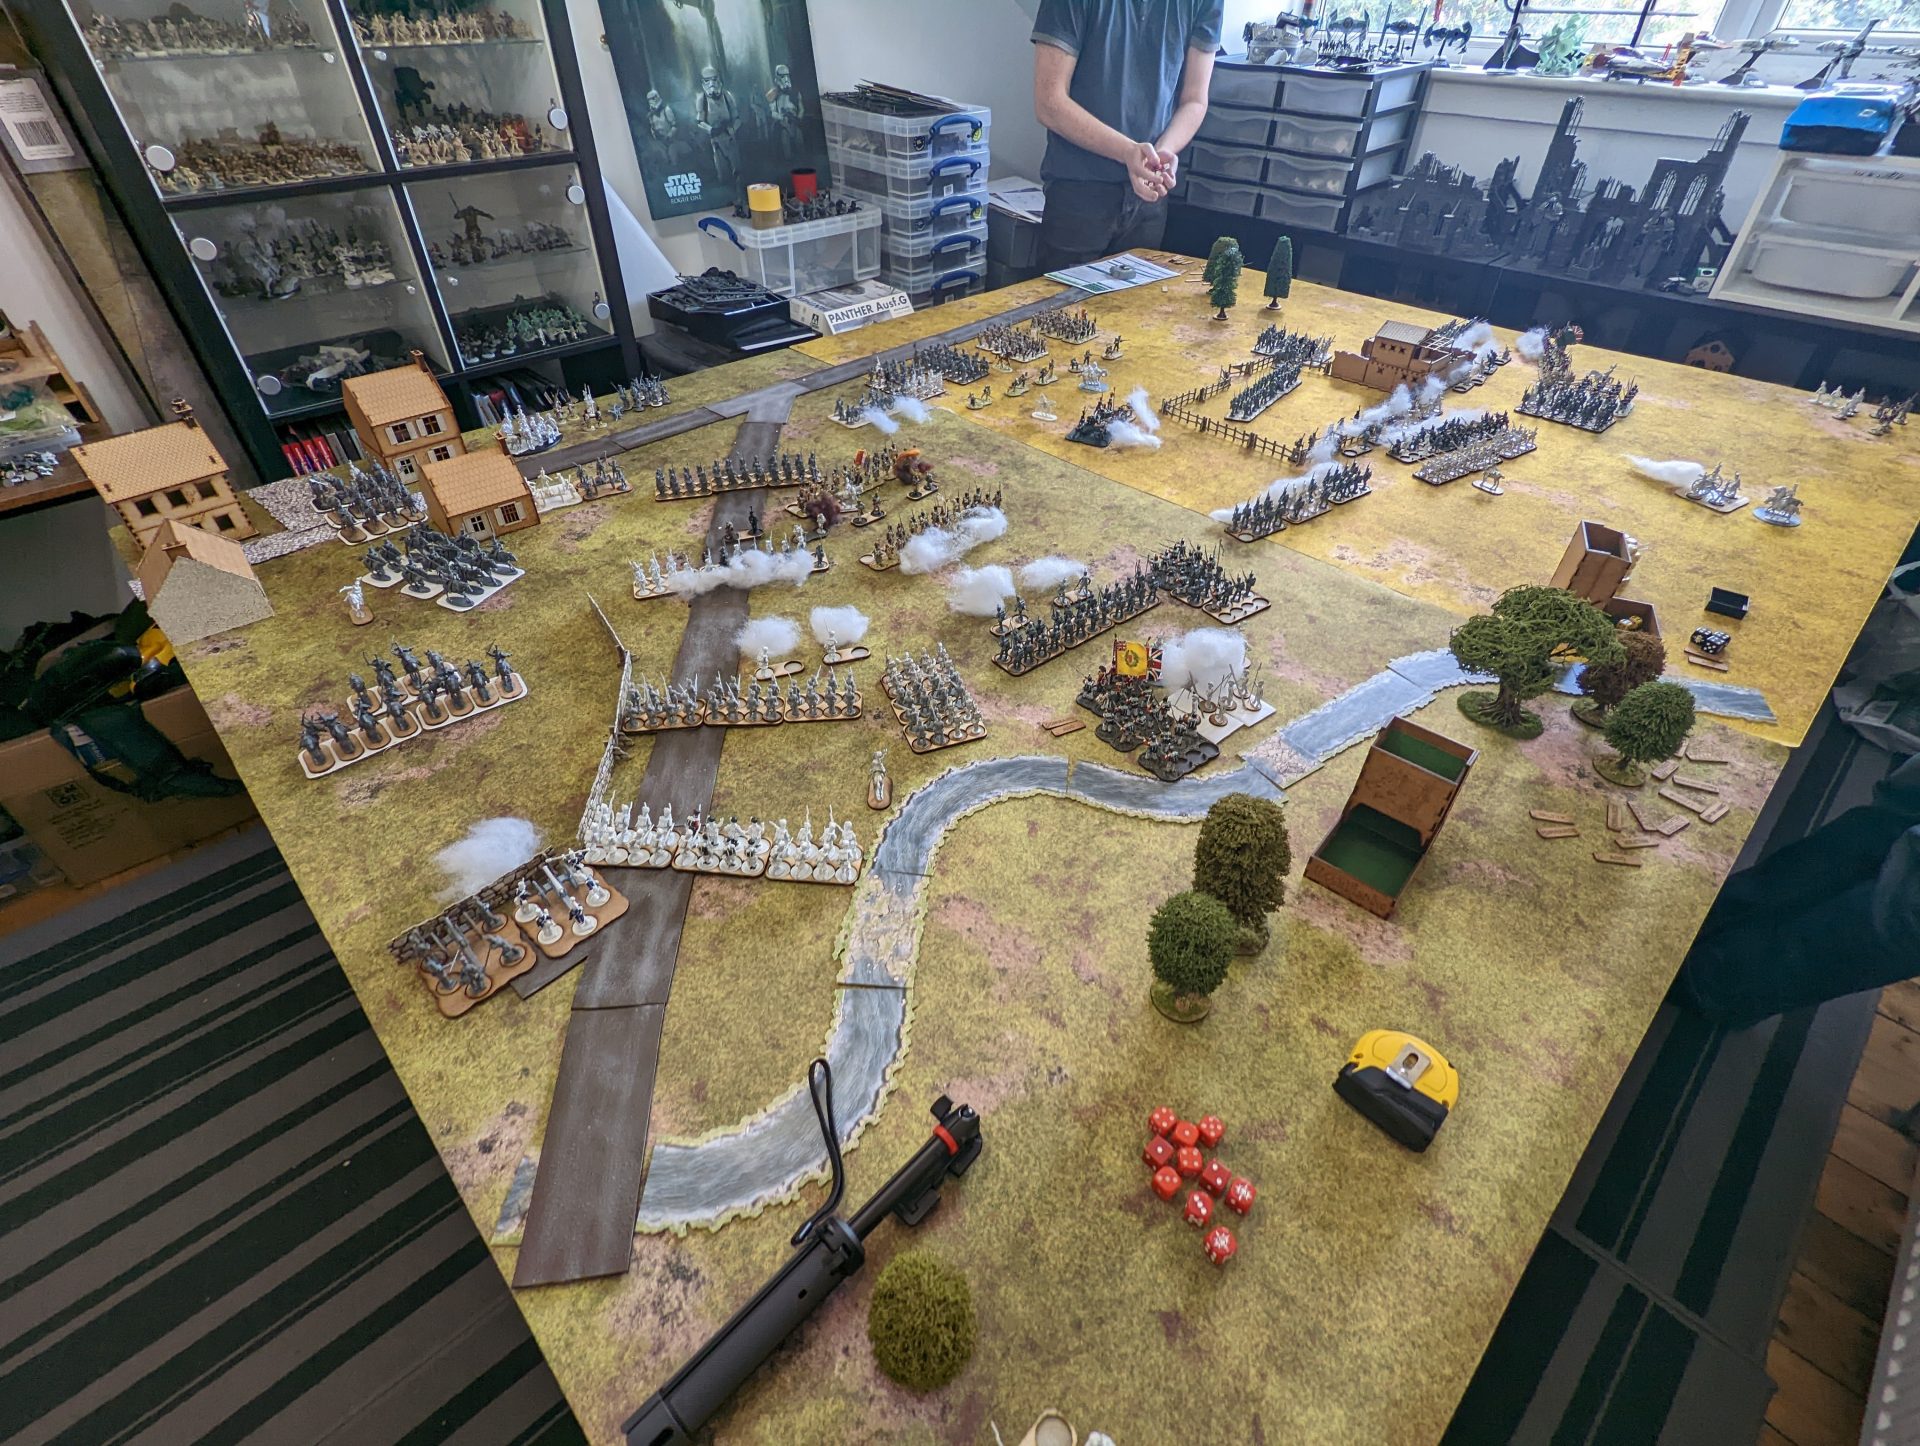
However, the French were not idle. As well as the cavalry I was dealing with, the French had started reacting to our attack, bringing the marching infantry into combat formations and bringing on another Divisions worth of troops. Good thing our host knew the system because he was running a literal pile of figures. These reinforcements also put some fear in us as we suddenly realised dicking around on our half of the table was going to help literally no one.
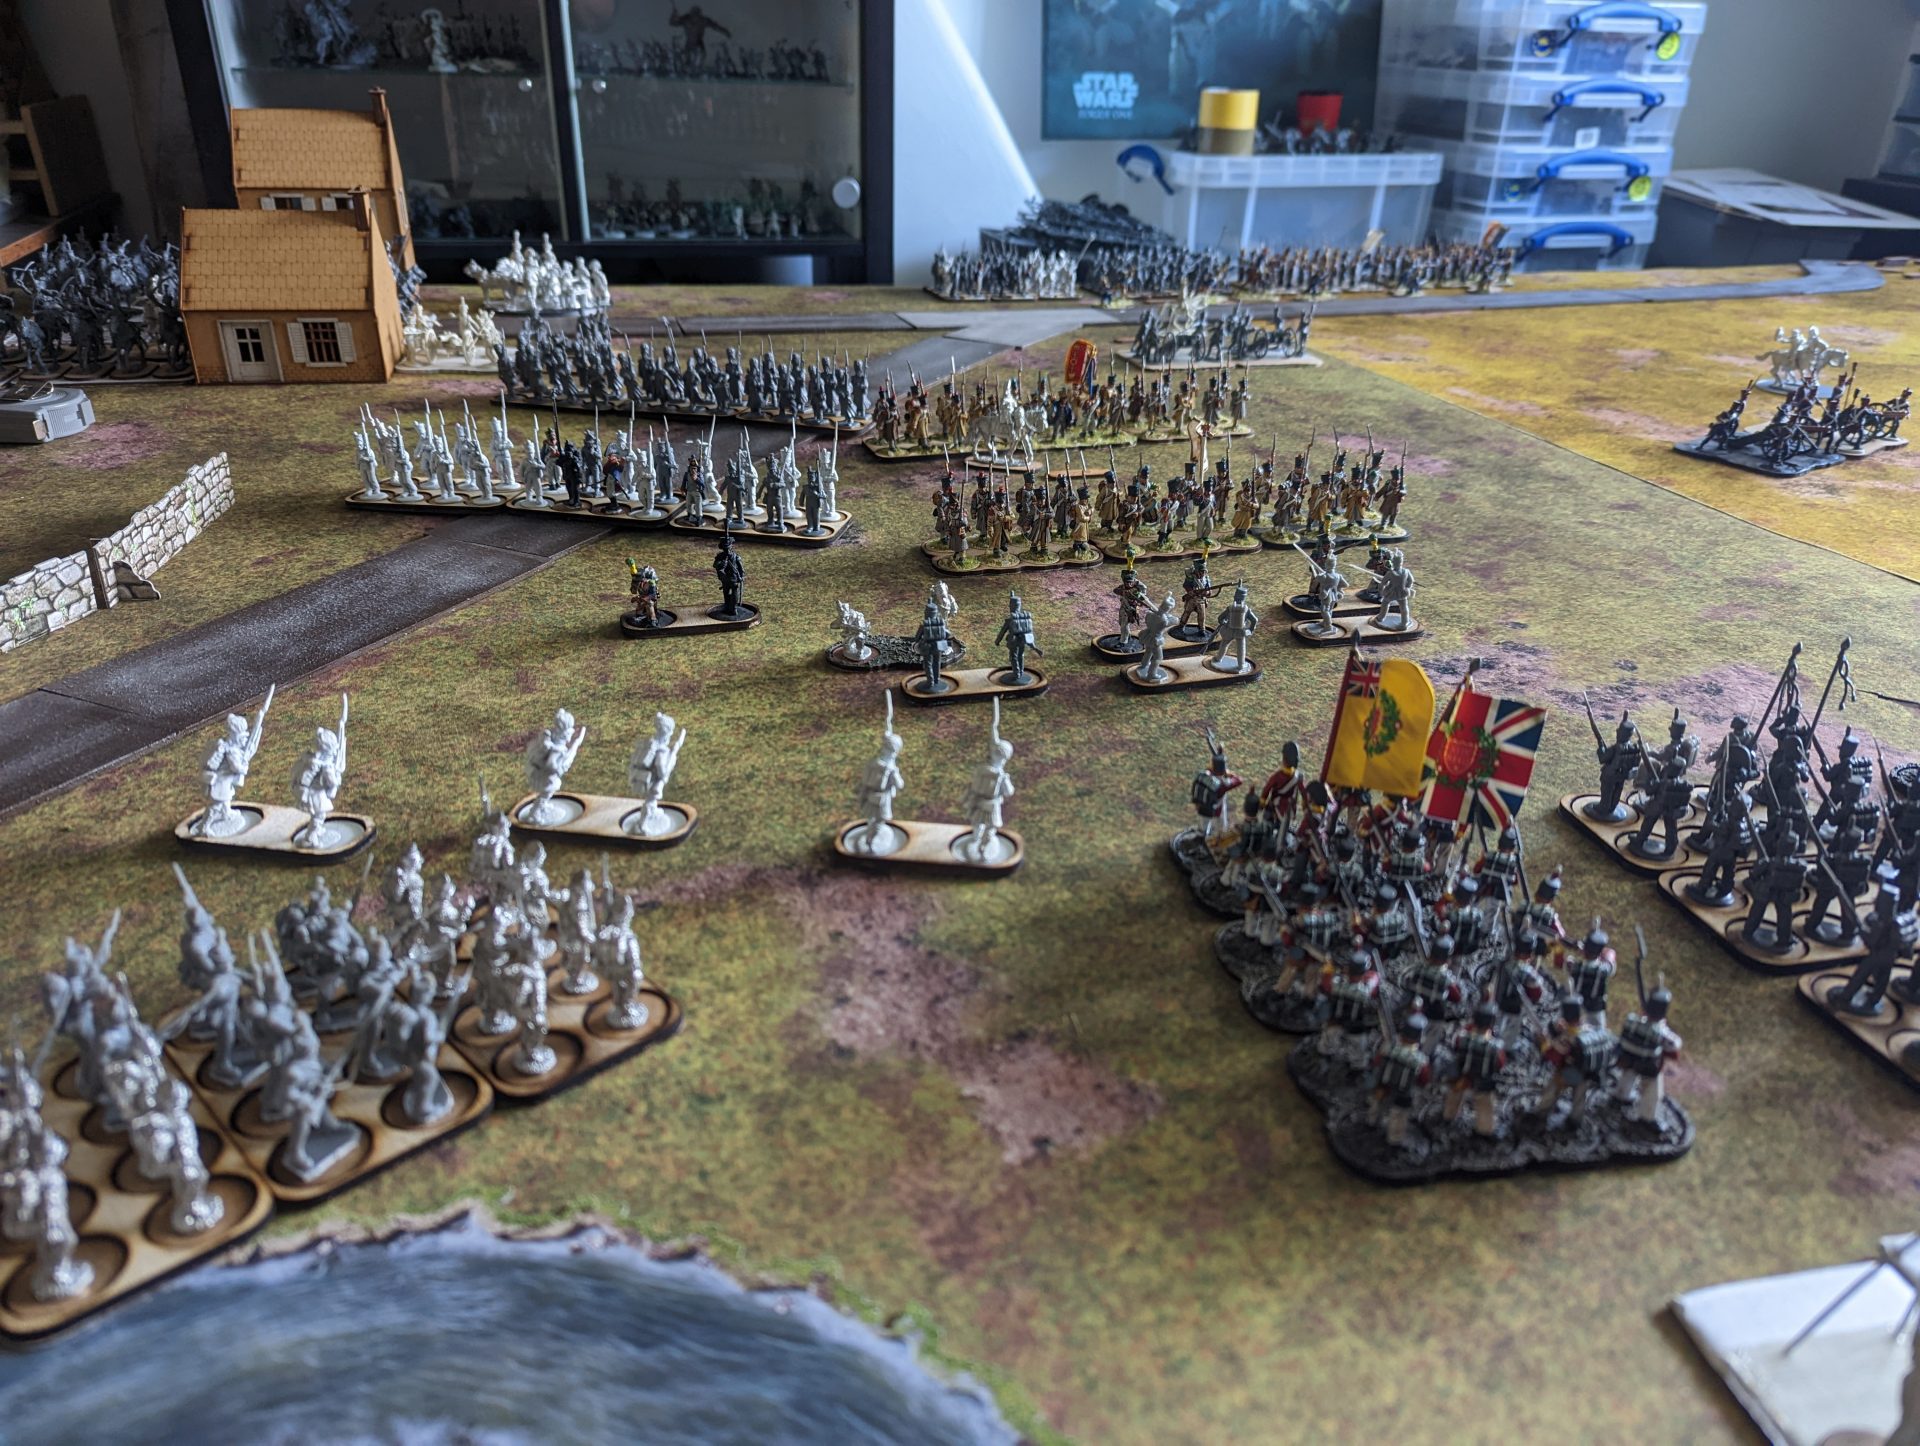
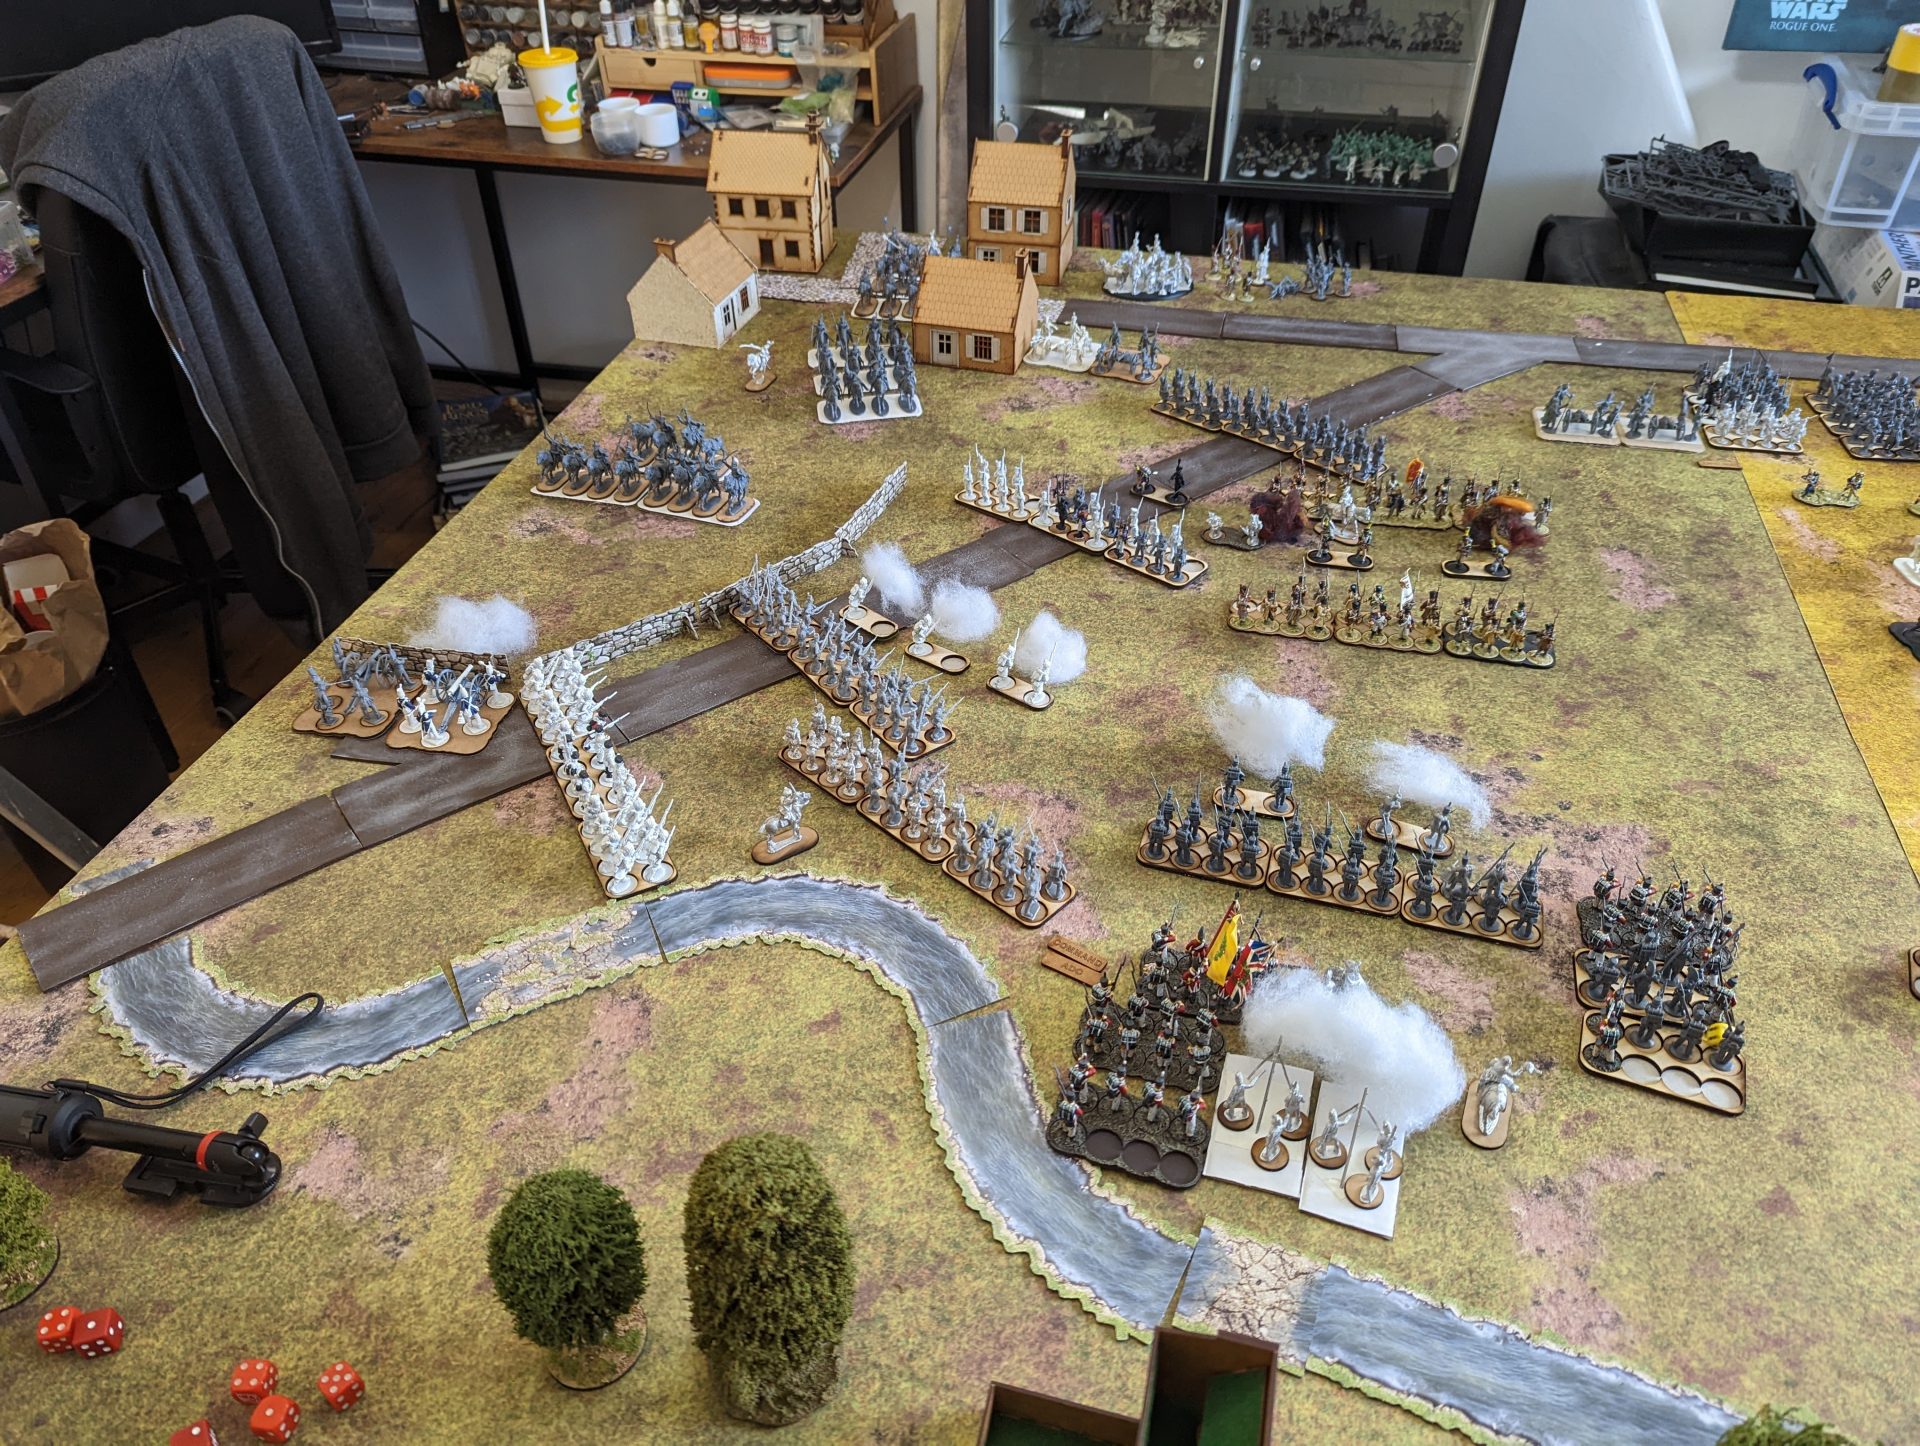
And it was at this point… It clicked. I finally understood the visual appear of Napoleonics, even with the unpainted figures. The table covered in lines of troops, the gun smoke between them, the additional blocks marching towards the sound of the guns.
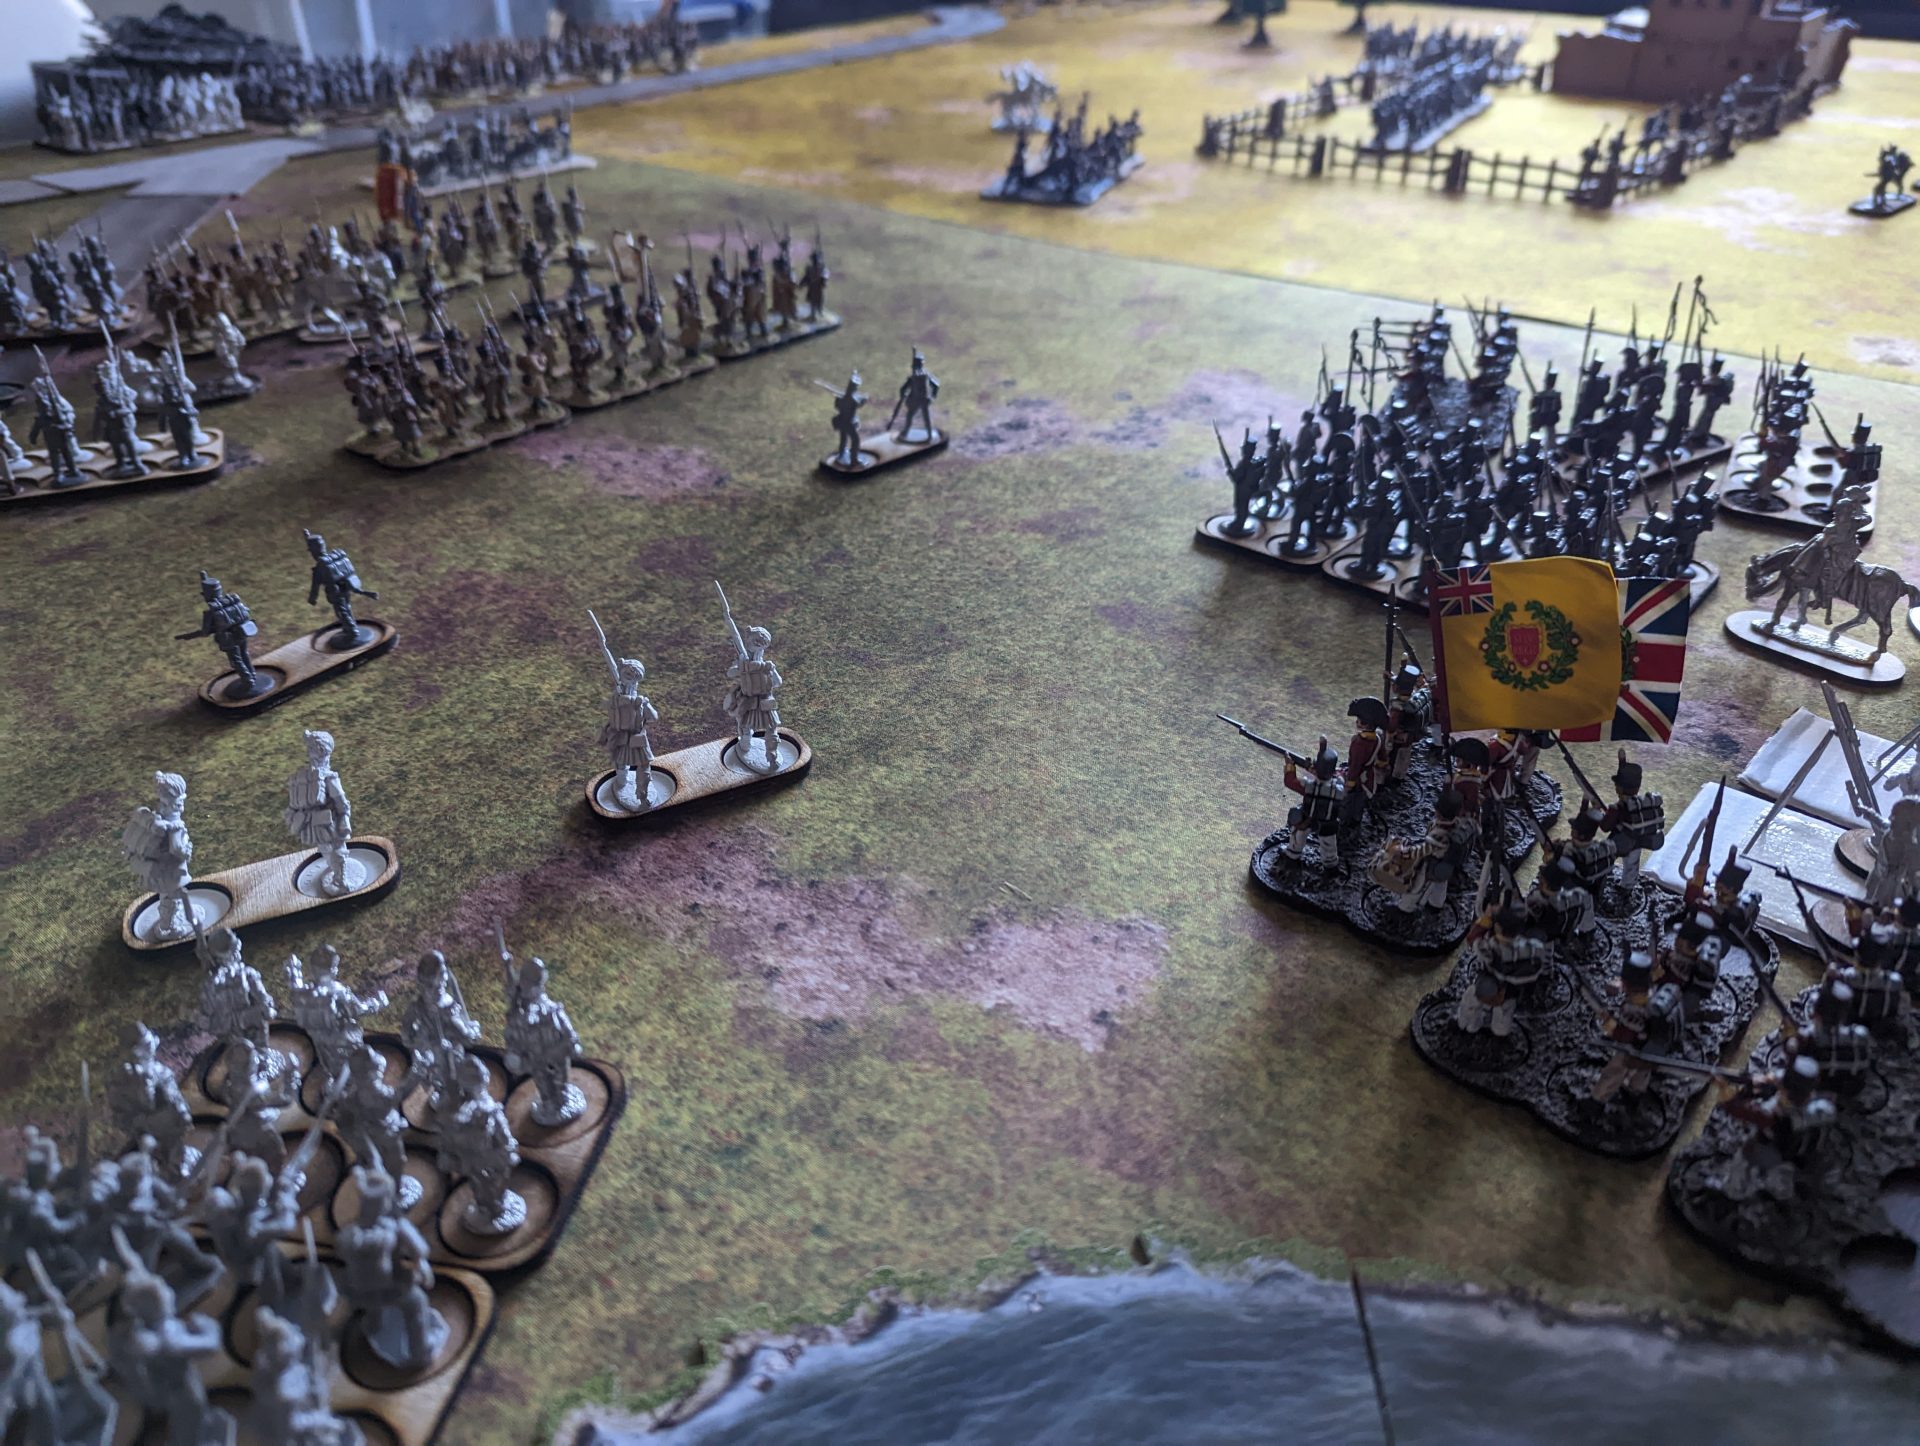
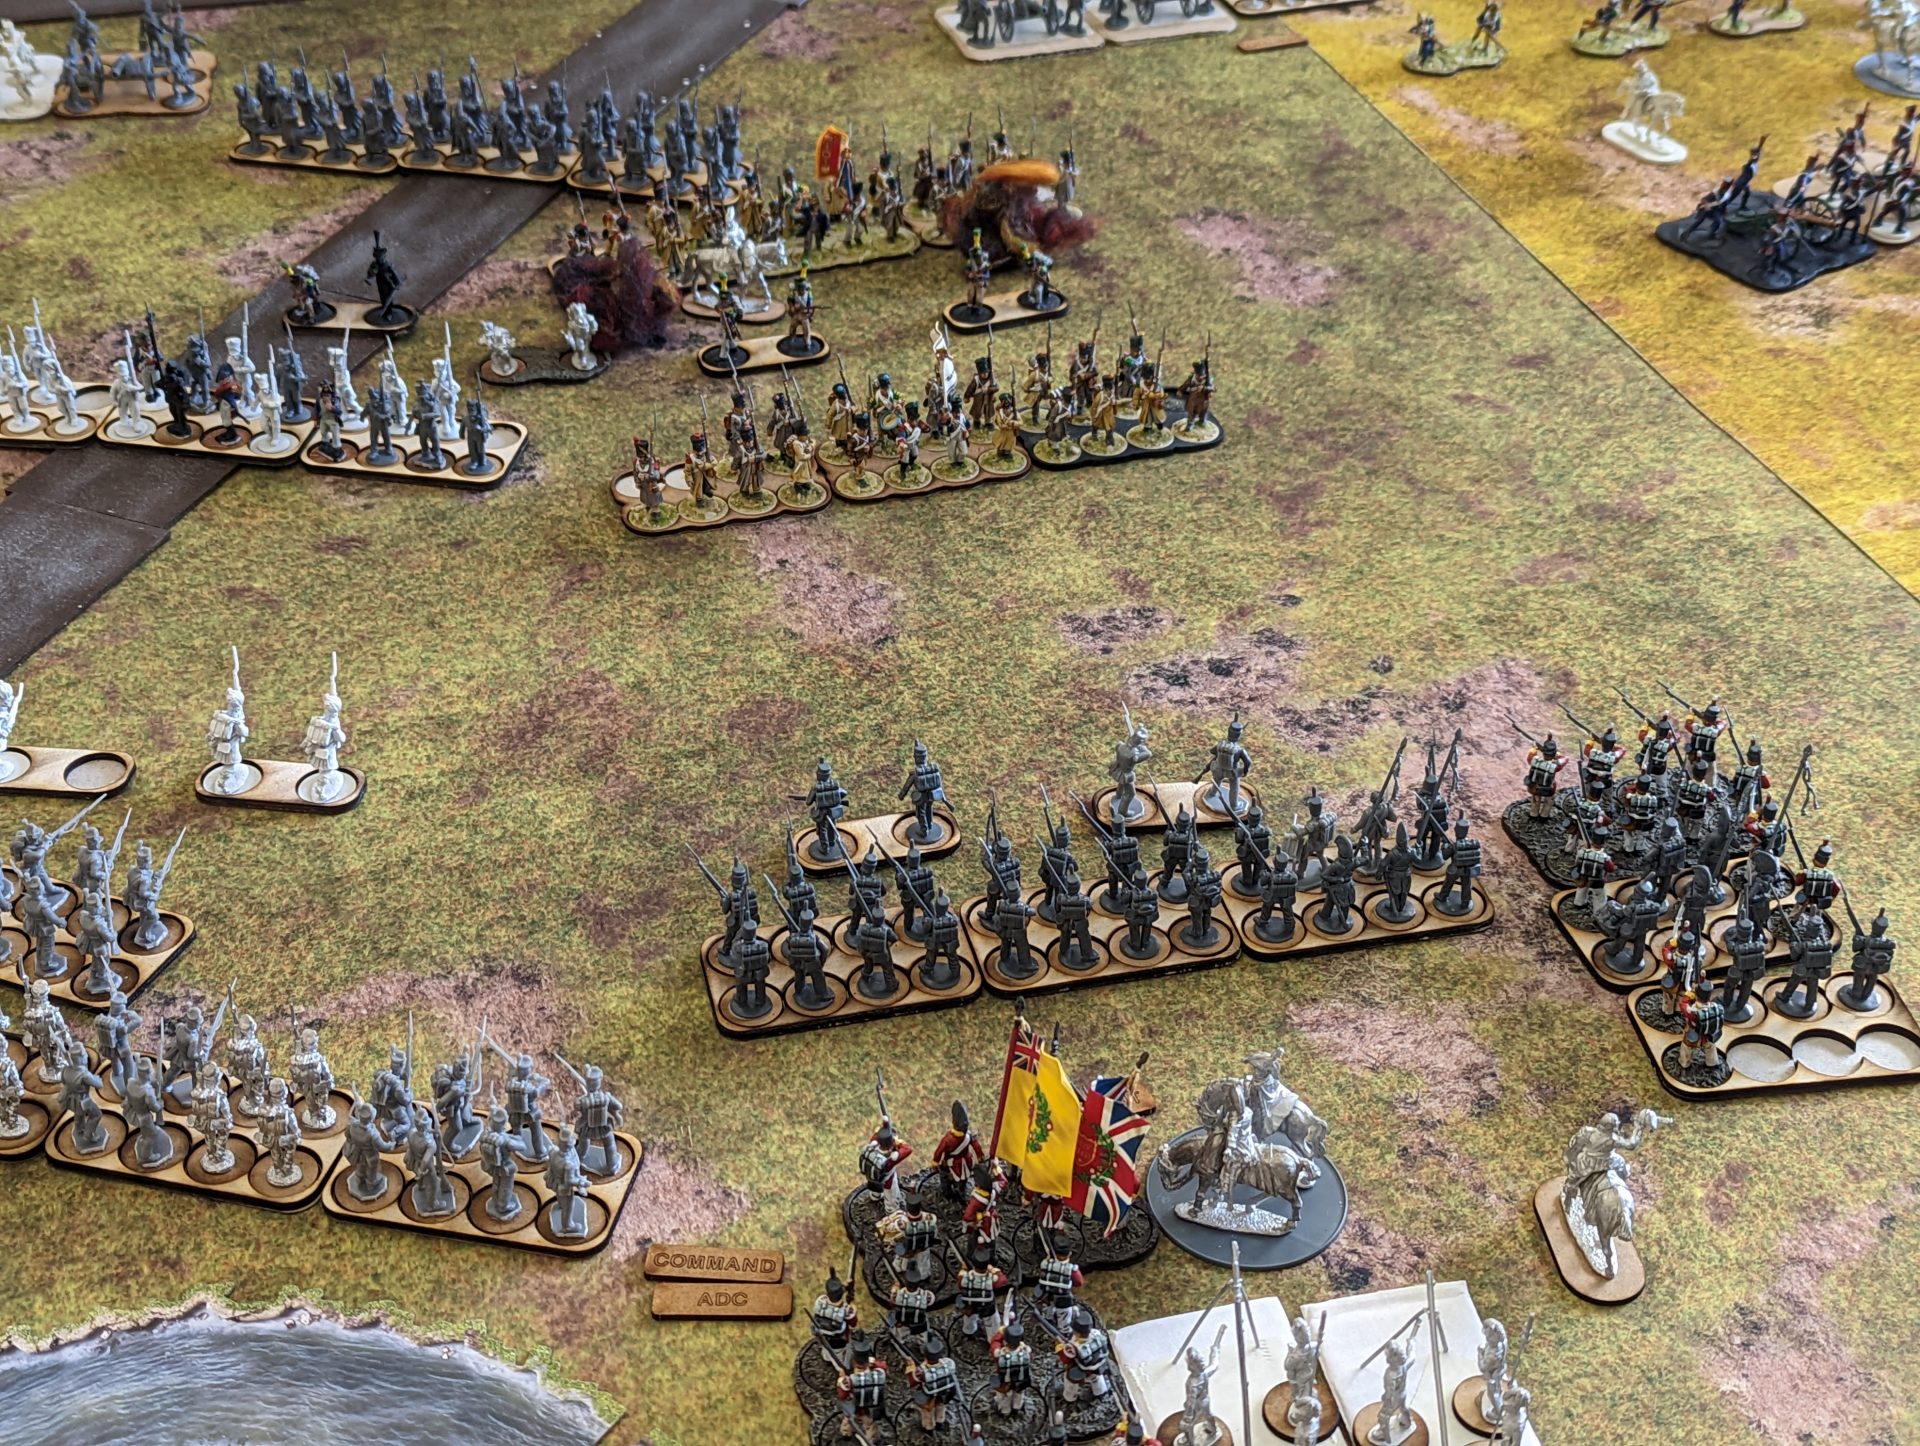
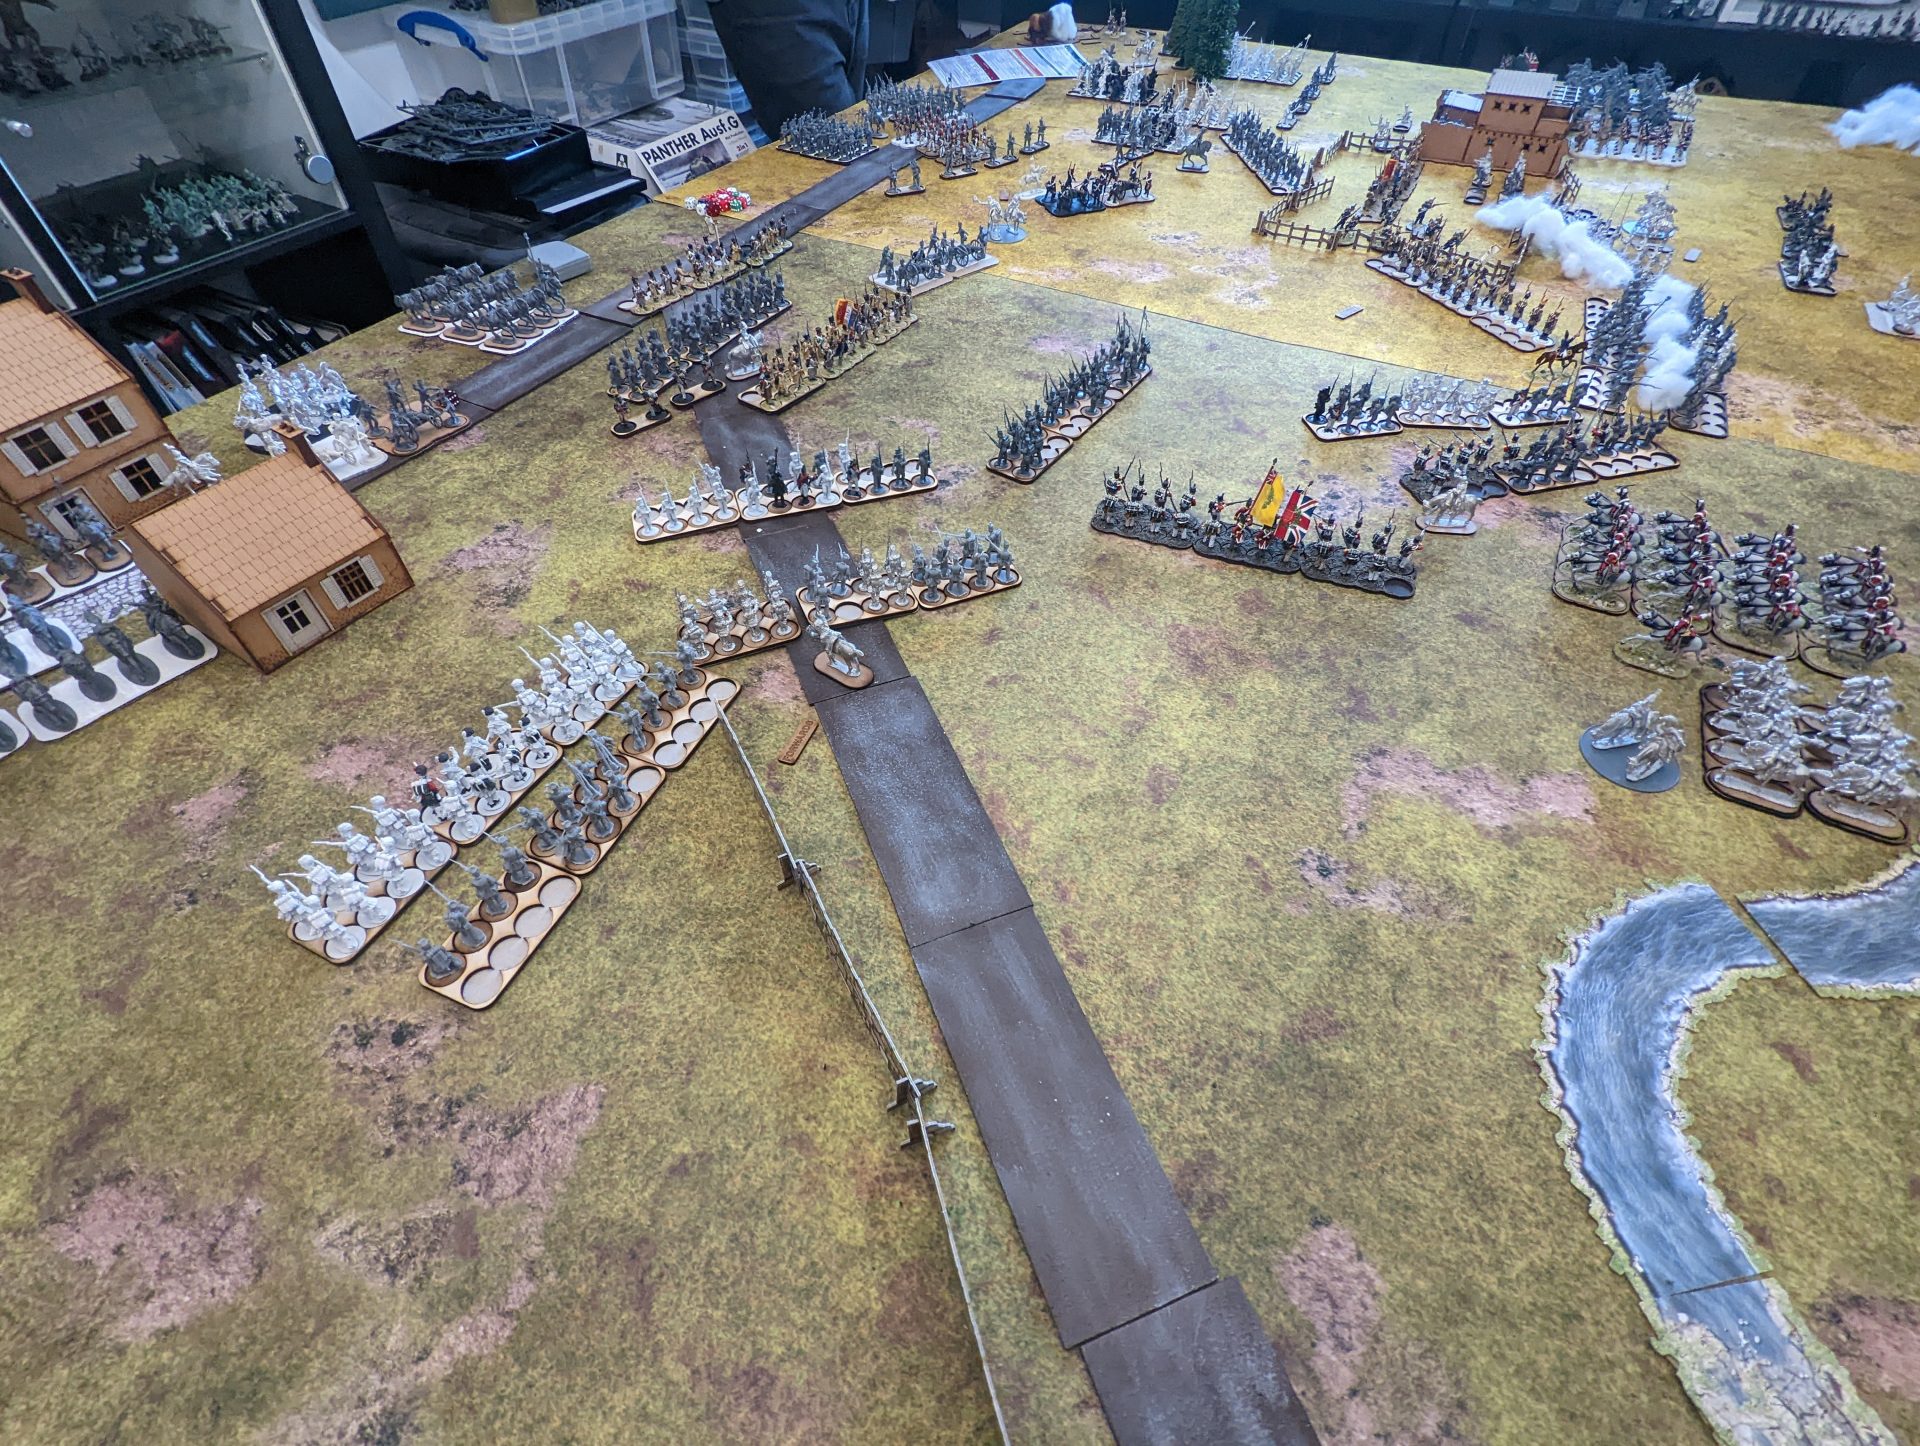
Of course, the gun lines got more interesting as both sides closed. The highlanders wheeled to use the wall in front of them as an additional deterrent to any advancing French cavalry (such as those damn lancers). Next to them, a square of British Infantry formed in reaction to the advancing cavalry, forming a corner point of the advance and connecting to a line of infantry. I was willing for the square to take a few hits, just as long as it kept my flanks secure.
In the centre, my other Brigade was marching its way up the board. While the front set of Infantry engaged in a gun duel, the right echelon was effectively sacrificed as a cannonball magnet. Finally, the Connaught Rangers took the rear, marshalling and getting ready to charge in.
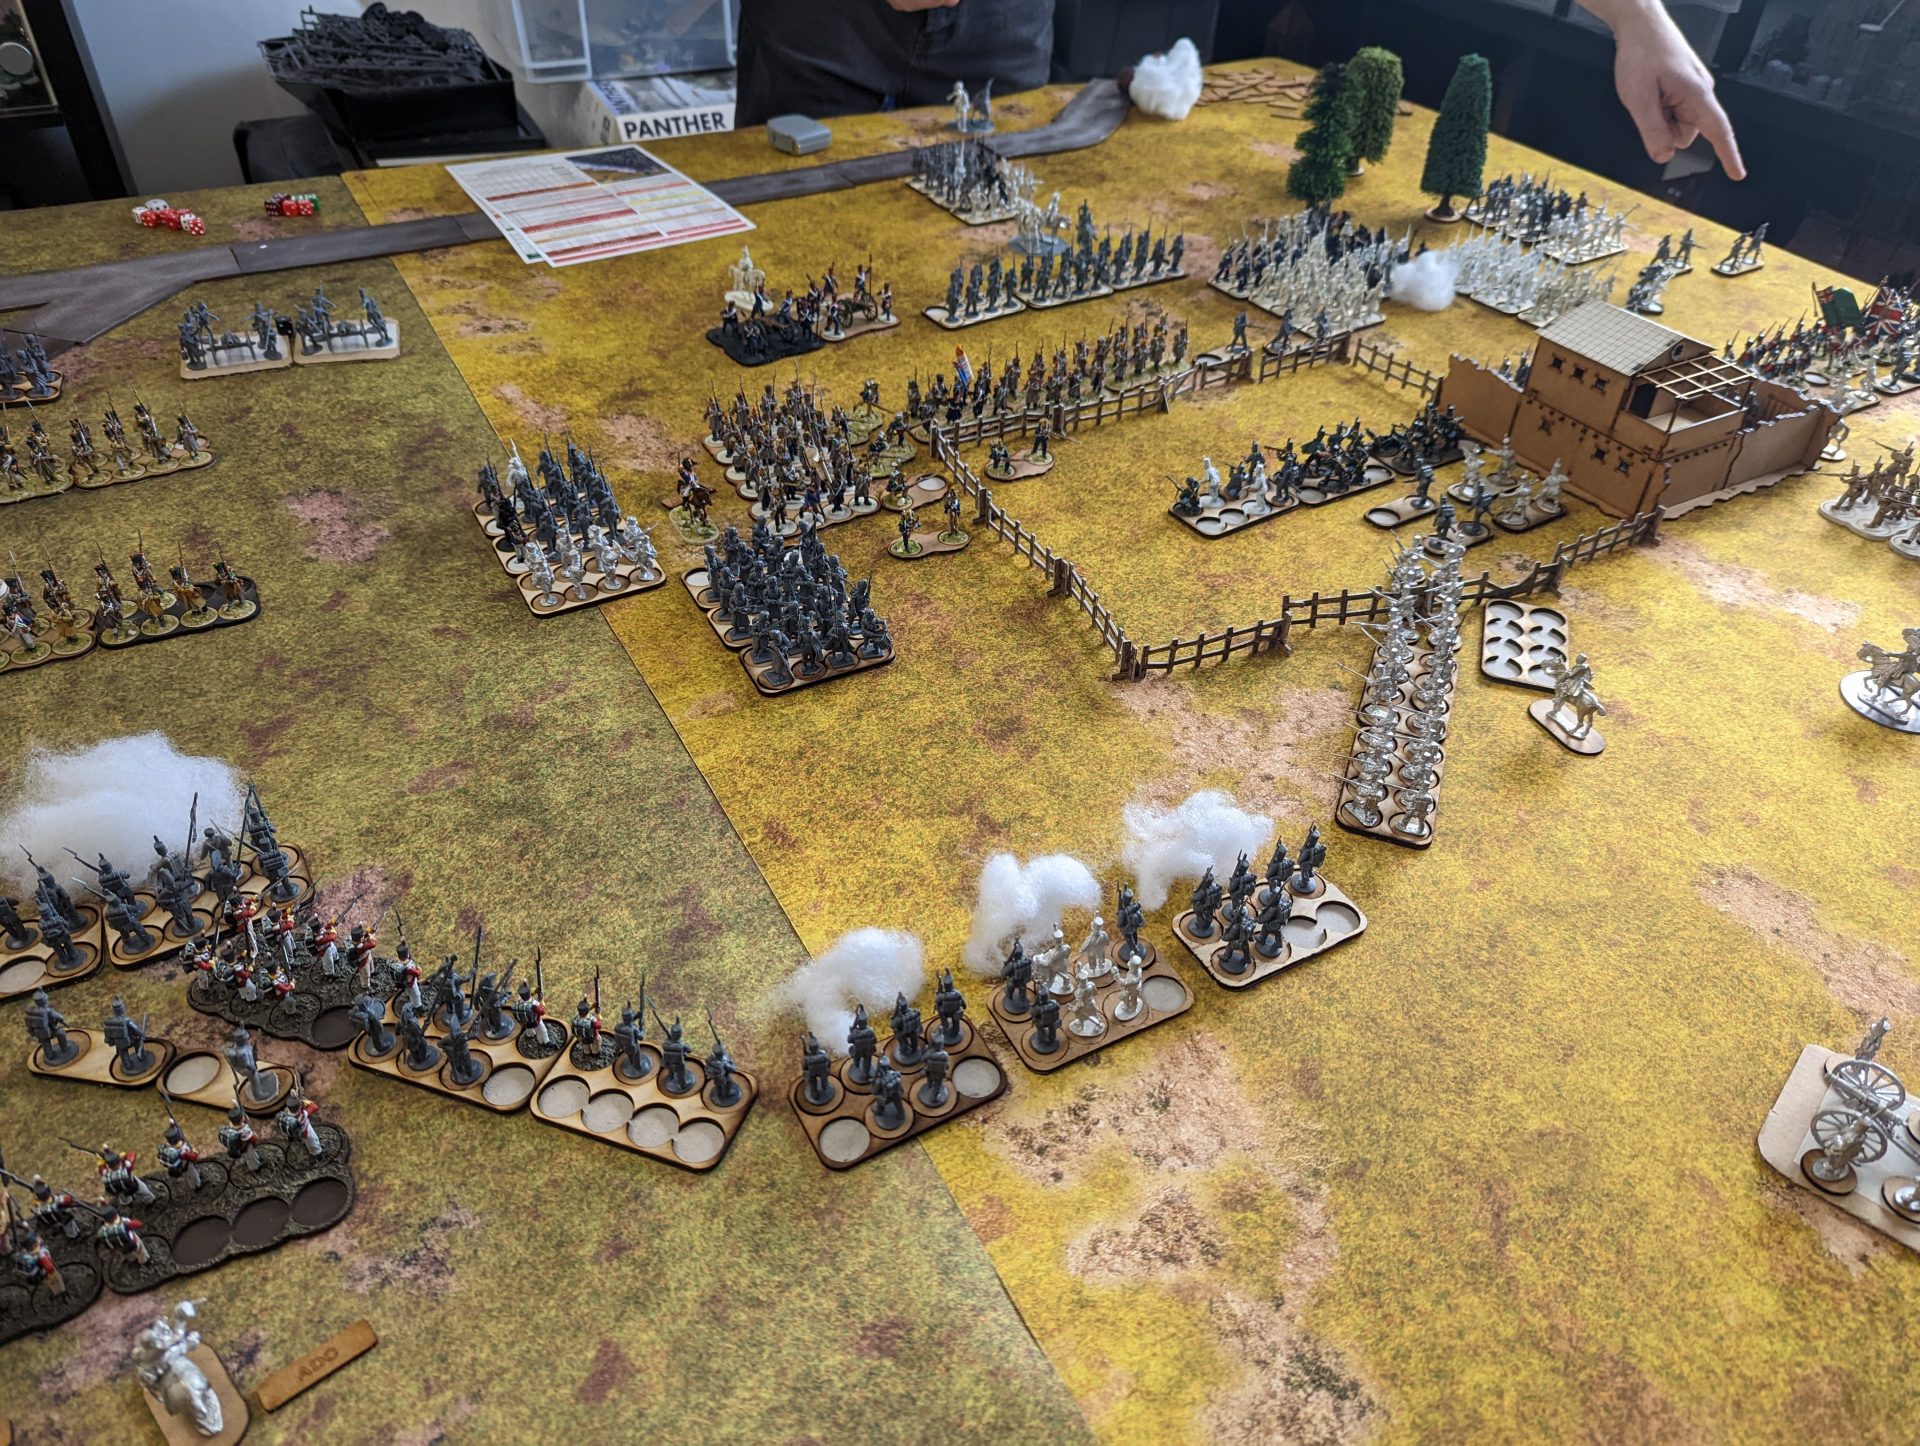
Speaking of charging in, with drums going and cries of “Vive L’Empereur” erupting, the french attack columns began advancing on the gap between the two Allied divisions. With this being on the edge of our area of responsibilities, there was a quick general conference before we decided to form ranks into this bucket formation, letting the French march into 5 rounds a bloody minute.

Due to being in charge of my own division, I didn’t take many photos of the Light Brigade’s side of the table. However, as you can see in this shot, you can see they have taken the Villa complex and are now strong-pointing it against the attacking French. The rifles continued their skirmish across the yard, very clearly aware of the mass of troops approaching from the front. Luckily, he had managed to get the light cavalry ready for any sign of a possible breakthrough – a concept I can understand from WW2 games and using tank/mechanised formations.
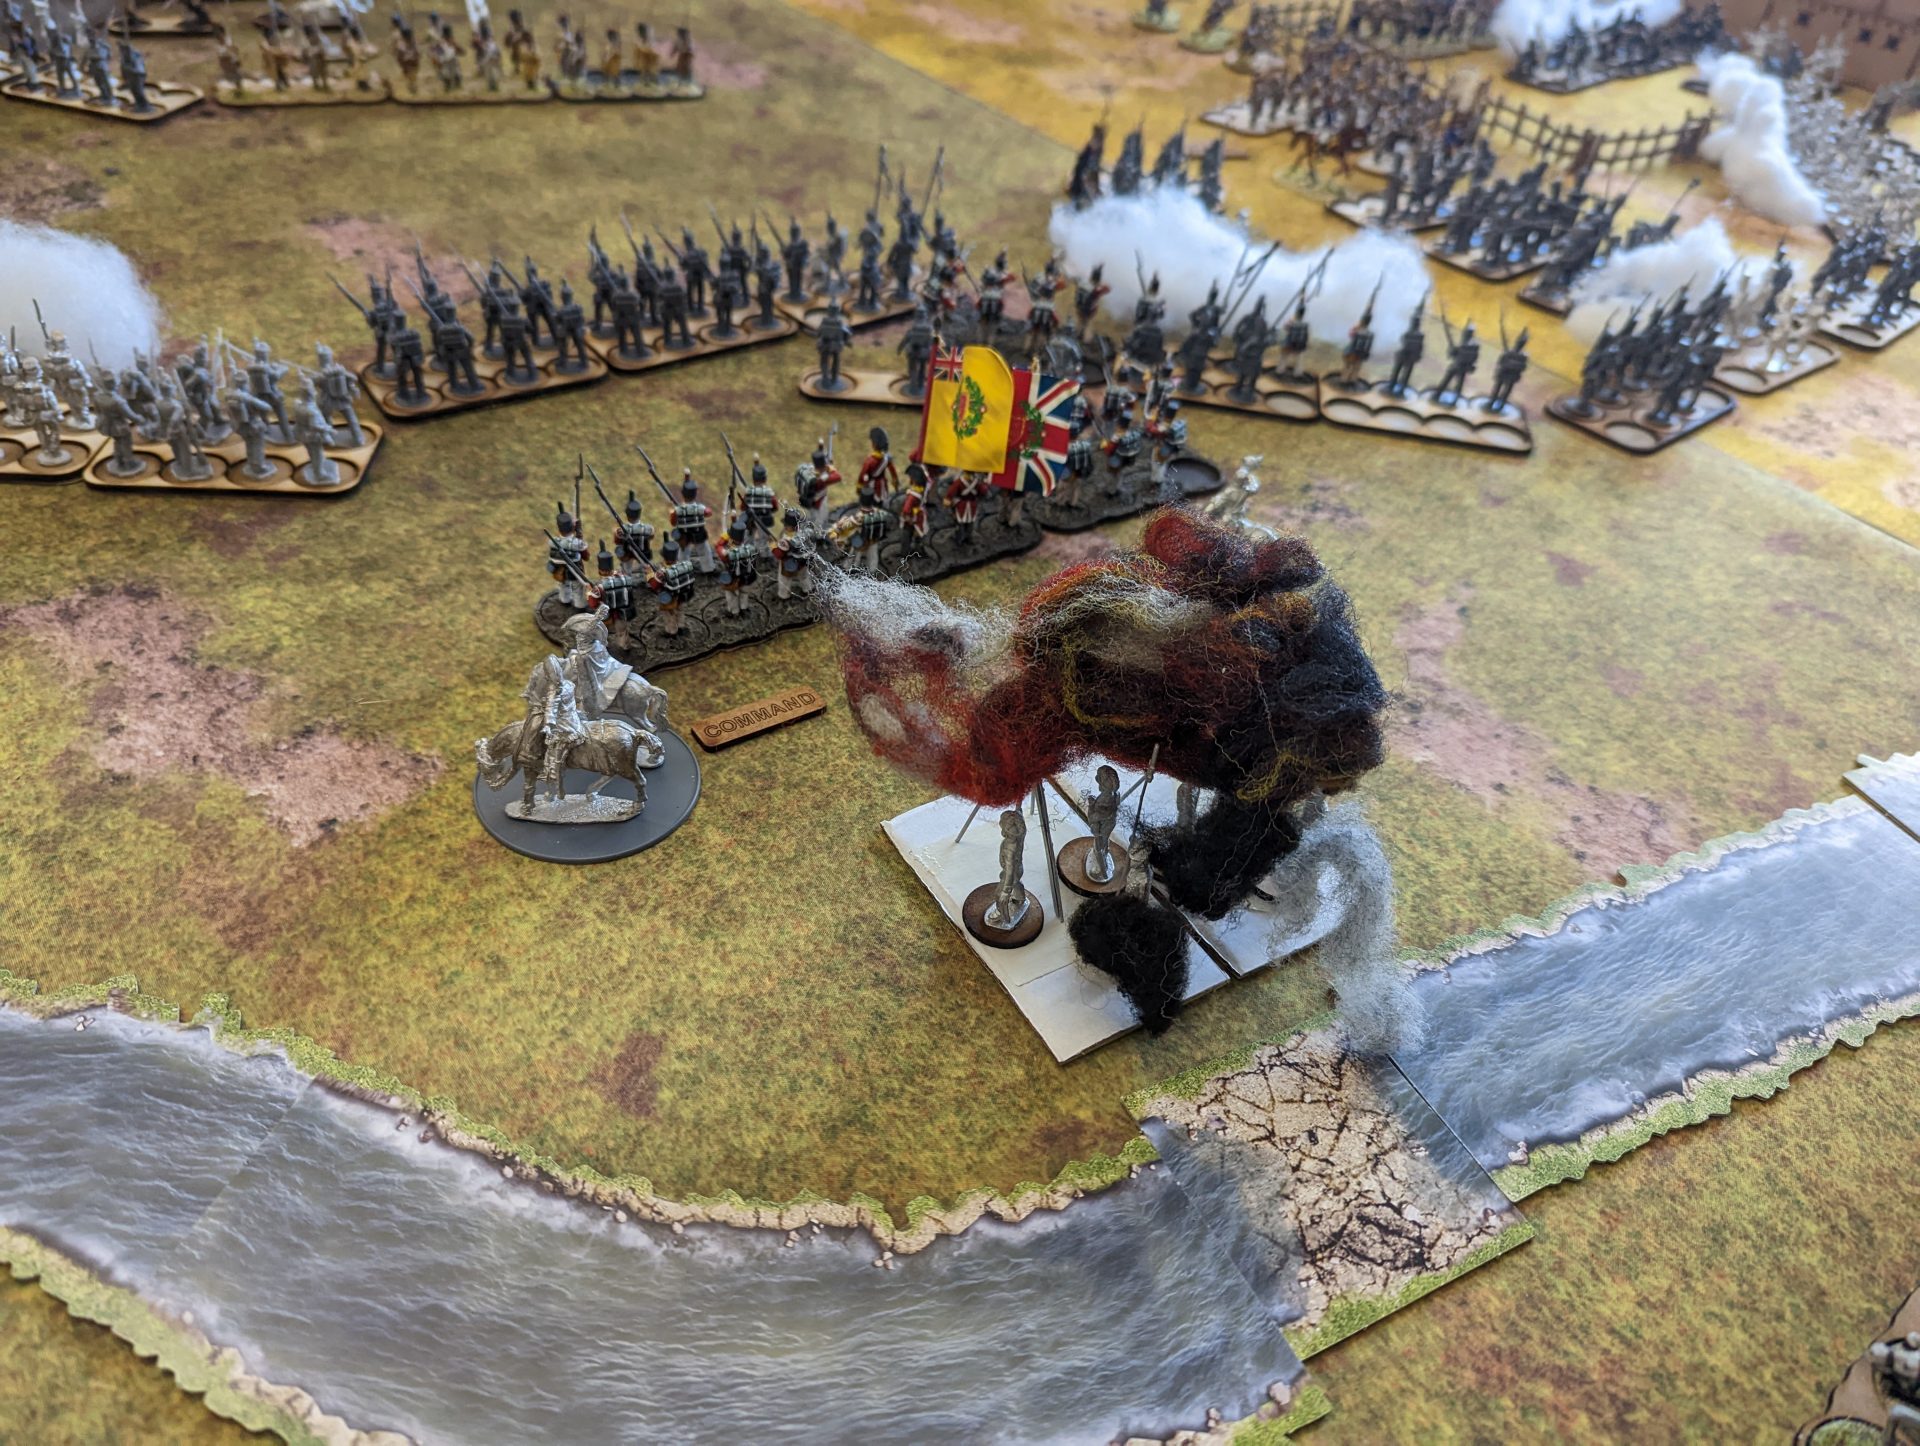
As the gun lines formed up, however, disaster struck. After several turns of useful rocket fire (including forcing the enemy cannon on the left to flee and stopping it from murdering my square), I rolled snake eyes on my rocket launch roll. As Picton was using his command to prepare the brigade to attack (and regain casualties to bring the Rangers up to full health), he was interrupted by the Congreve rockets behind him immolating on the launch rails. Luckily only the rocket crew were injured (versus one of the rounds hitting the Irish lads) but it meant I was now down one artillery battery.
Damn those rockets – the candle that burns twice as bright and all that. I did like just how effective they were. True it was a risk, but the ability to drop disorder tests into the back ranks without LOS was definitely a bonus.
But with the negatives come the positives. I also managed to get my cavalry on the board and into action. Unlike the Light Cav every other player had, I had some heavy cavalry in the form of the Scots Greys (which technically didn’t see action in Spain but have you seen how nice they look?). Having watched how using them can go horribly wrong (we’d had the Waterloo film on in the background as ambience before moving onto Sharpe episodes), I ended up sitting them where the rockets had once been, waiting for a break in my lines or the sudden need to rush forward.
Speaking of, with the arrival of another French division, things were starting to get out of hand. As much as we could trade rounds back and forth, we had to secure positions on the far side of the board. The Light Division (ironically) was currently stuck fortifying its strong point against the hordes.
So, I leapt into action. Firstly, the highlanders and their battalion rapidly advanced. This allowed me to cross the wall and form a line in front of the village, a move I could only get away with due to the enemy cavalry spending the turn hesitating. In the next turn, the Infantry would (under a Command order) charge in, push the enemy back and take the town (meaning Picton would actually achieve his objective in this game).
In the centre, I turned the Rangers into a position to pour fire into the advancing French. Unfortunately, the lead group of this was about to get hammered by French gunfire causing a major command issue that forced this group back as one of its battalions broke entirely. The remaining infantry fell back, causing the cavalry behind to become unformed as a bunch of scruffy infantry oiks does have a slightly concerning effect.
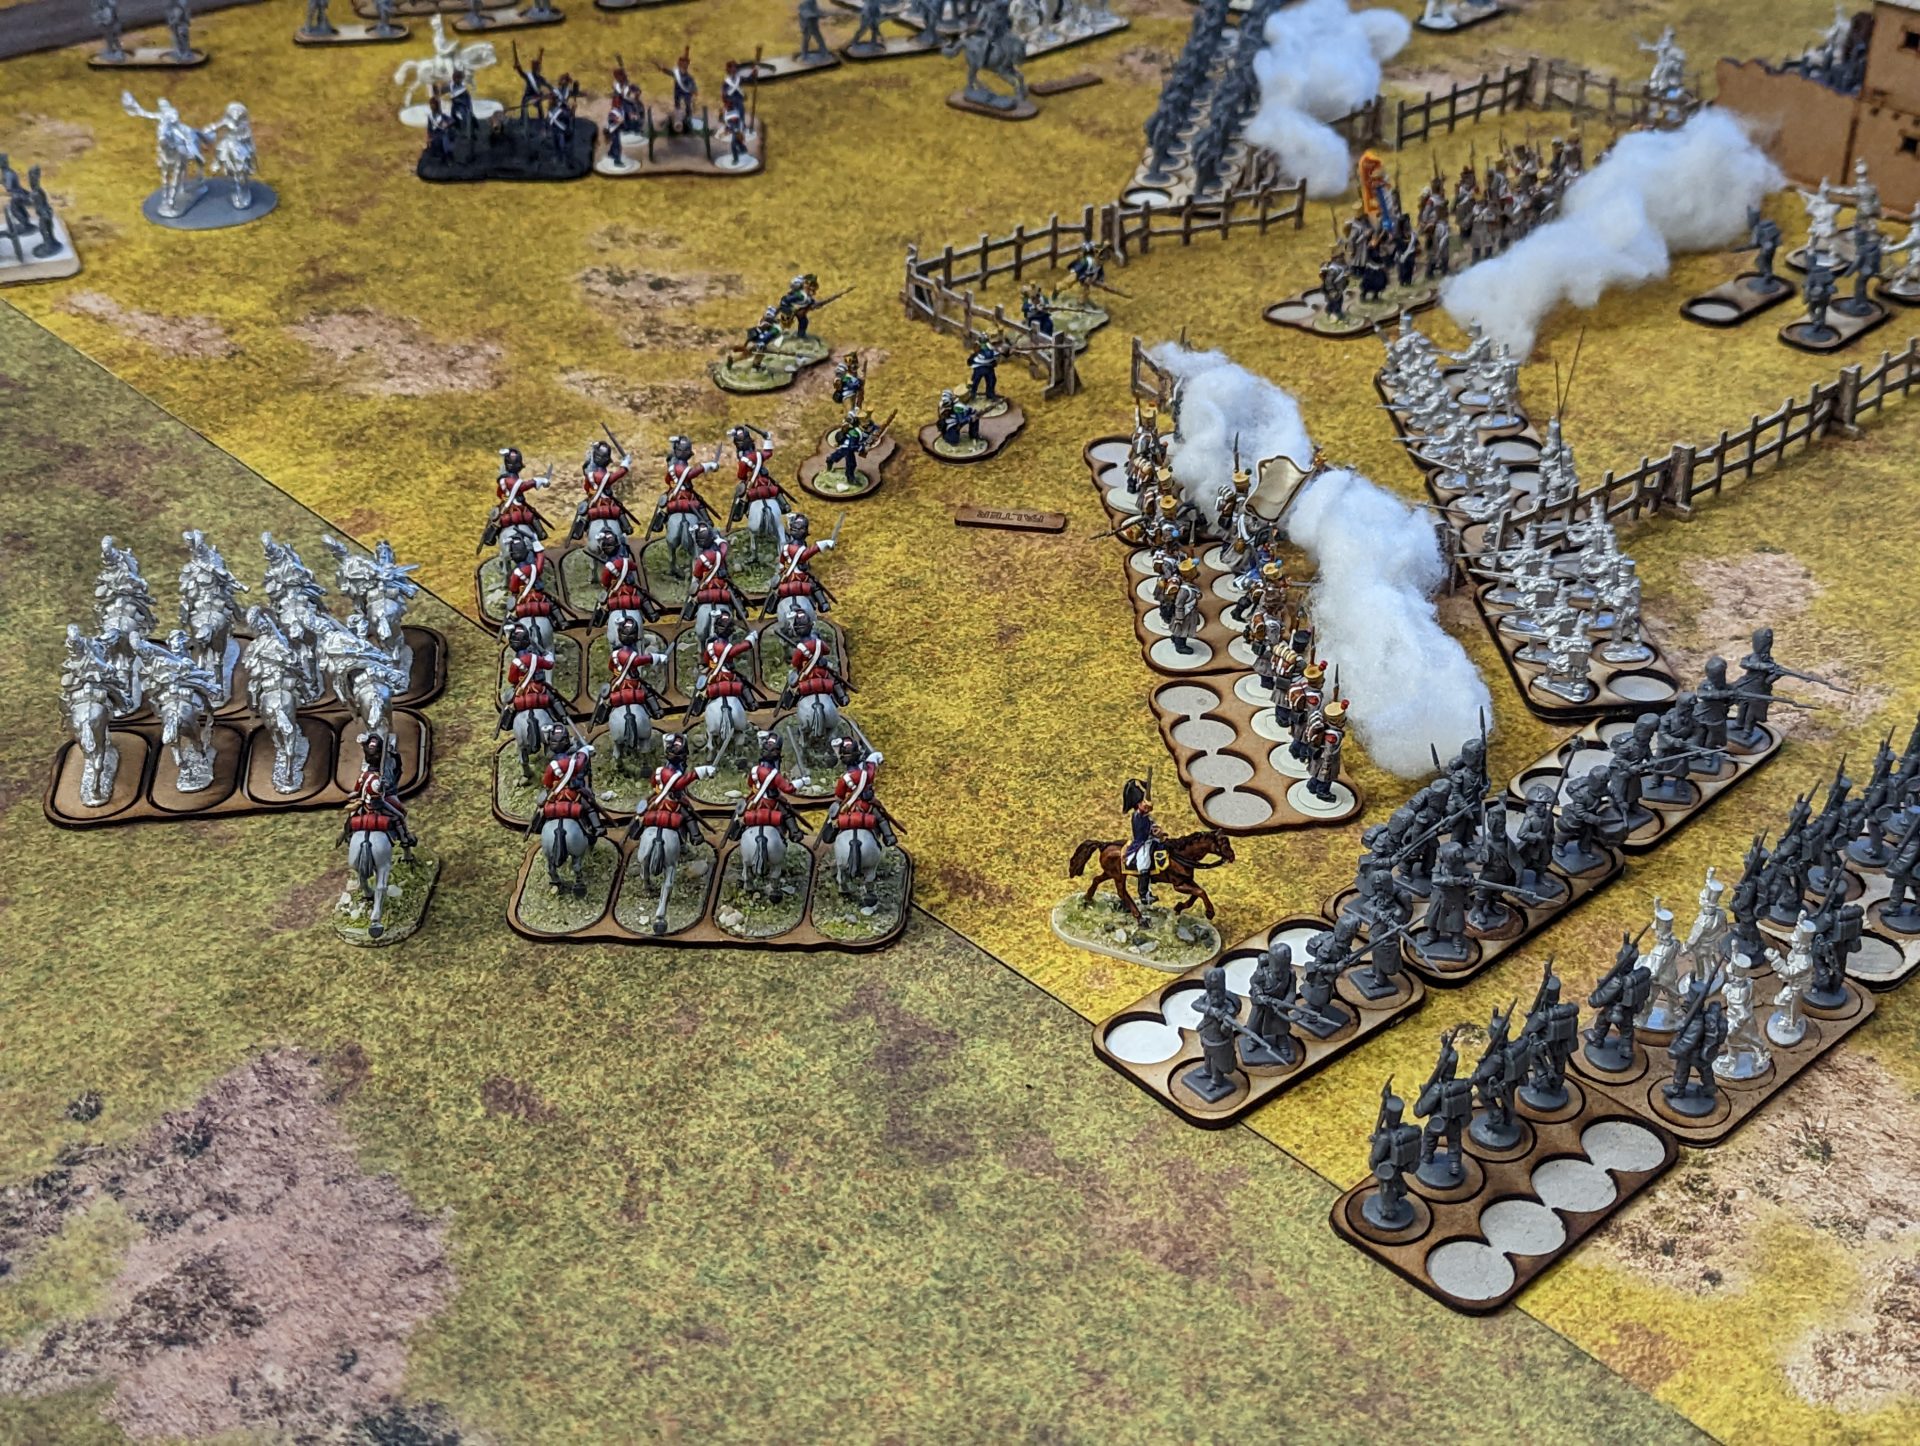
However, unformed cavalry is still cavalry, and the falling back of allied troops left a big hole directly in front of them. Without pausing to reinforce, I drove the Scots Grey forward and they slammed into the French skirmish screen. And then slammed into the French Infantry. And then ended up in a position where in the next turn, they would probably be about to run rampant through the artillery beyond. Turns out, heavy cavalry is a machine designed to turn weakened and unformed infantry into mincemeat.
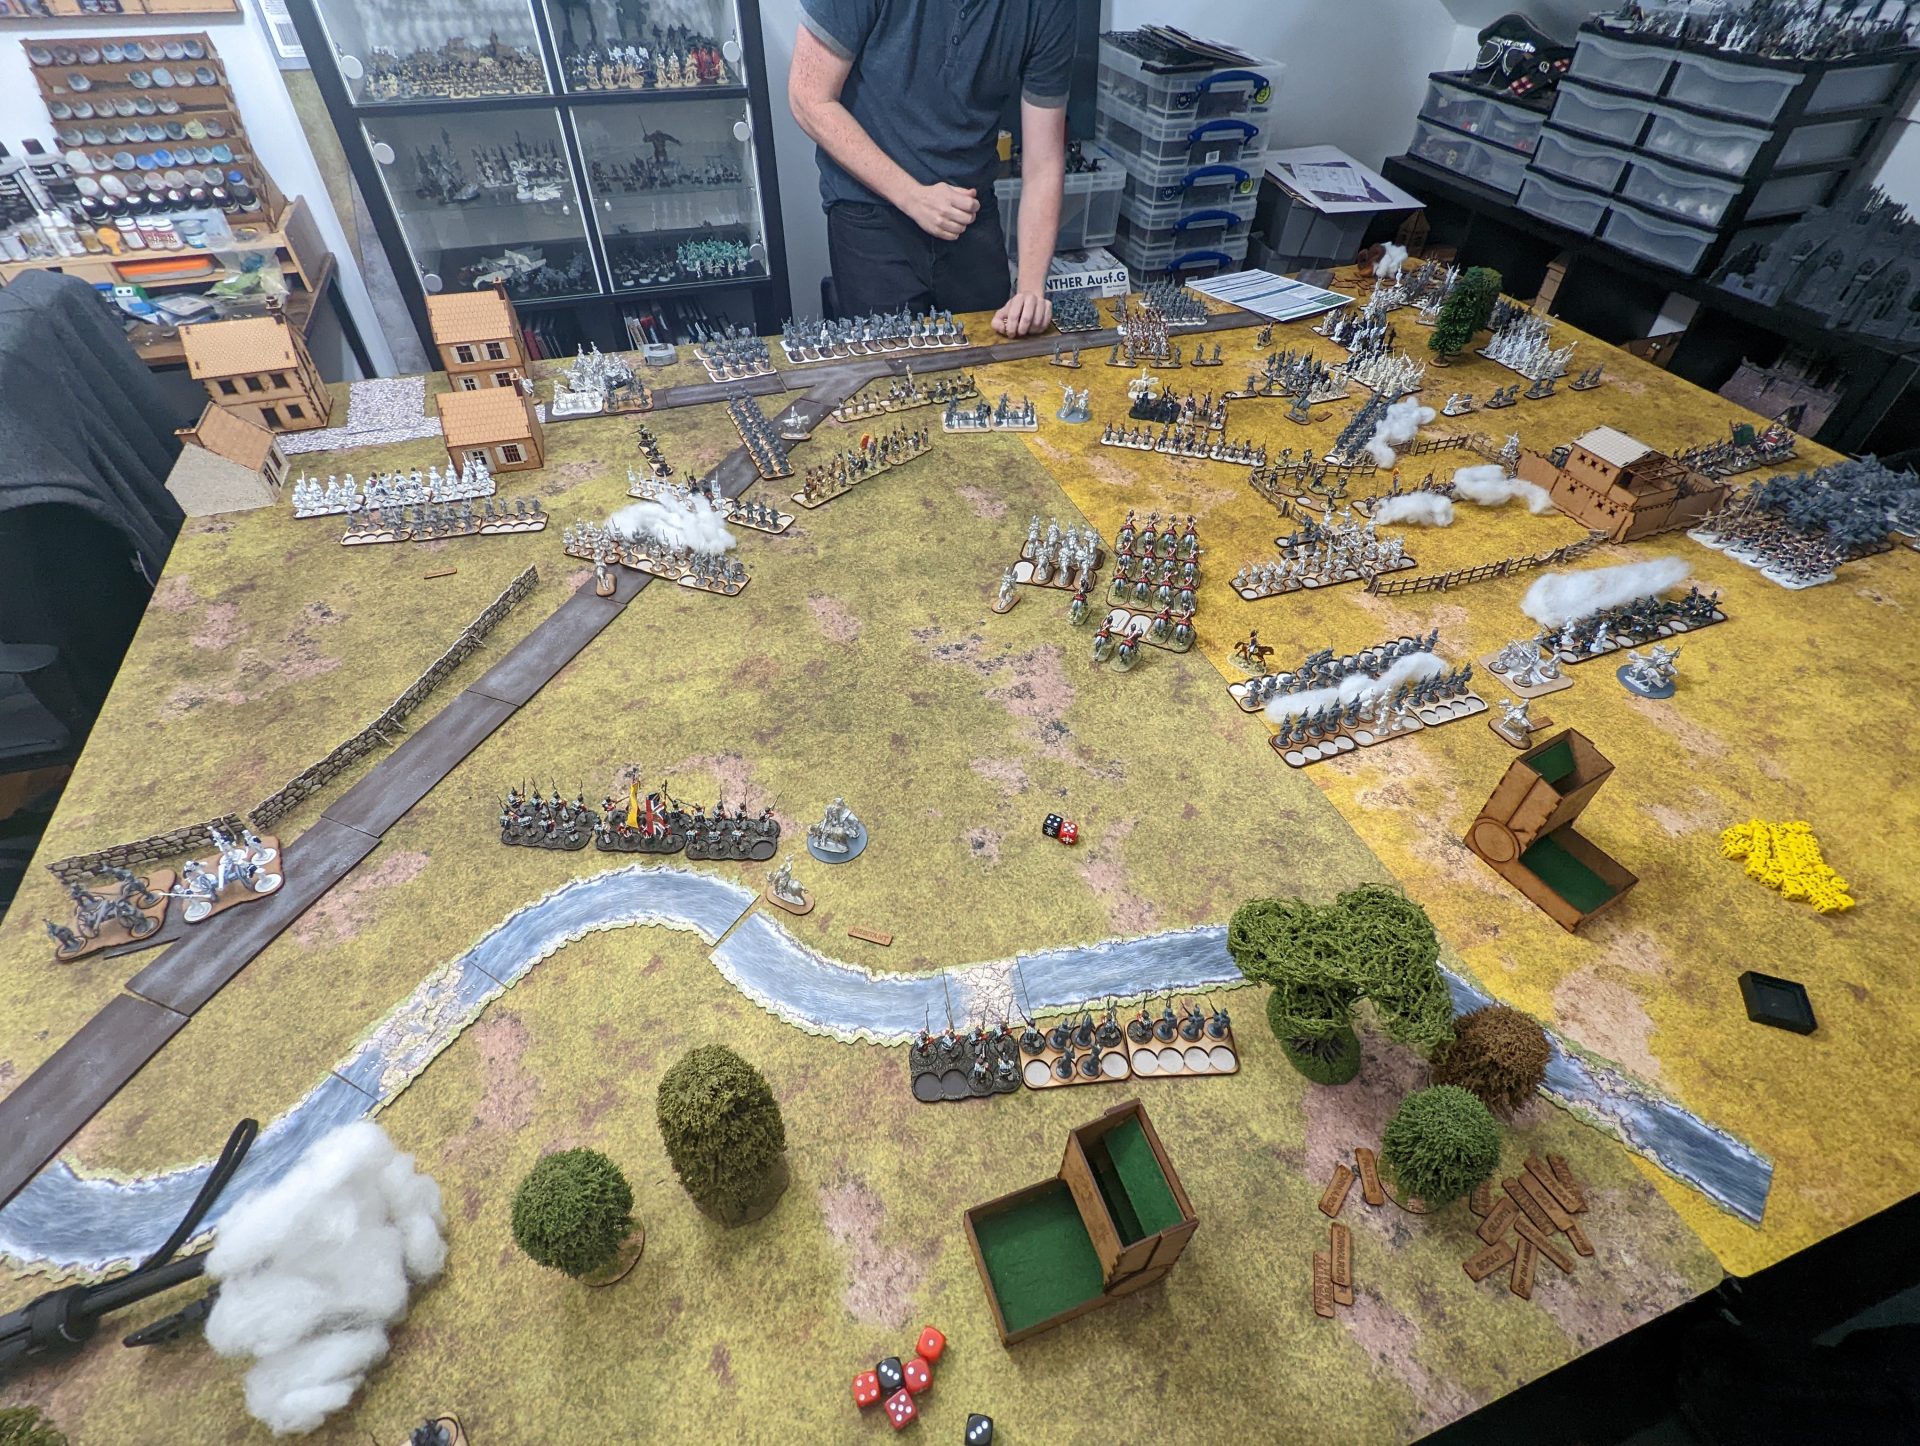
It was at this point we realised it was almost 7 pm at night and we had to stop playing. From looking at the final result, we declared a minor Allied victory – we had secured the village and tied up a large number of Frenchmen, letting the rest of the army push forward.
Overall, we had a really fun day of gaming – both I and the Dastardly Regular Opponent Semi-Regular Ally found the rule system really easy to pick up. The quick reference sheets definitely did their work, but the core concepts reached the stage where we weren’t frantically checking them at every move. I really like the ADC system, with you spending potentially expensive command decisions before even rolling to see if your battalion can activate. It’s a fun bit of friction that came up several times, evoking the feeling of sending out a rider to pass on your orders. Of course, it was enhanced by the fact we also had three additional ADC dice each turn, representing Wellington sending additional orders to the front. We were restricted by the fact we had to decide which division was getting all three, leading to several whispered arguments about who needed Wellington’s dice more.
As for Napoleonics as a whole? I don’t think this will ever be a period I personally get into (mostly because the Creative Regular Opponent has a full collection of it), but this game definitely helped me to see the draw this era can have, especially at this game scale. In a game that actually has the ebb and flow of battle as opposed to being merely an impressive display, I actually really enjoyed the “geometrical war”, such as using the square of infantry as a bulwark for the other two infantry lines on the left or forming the ‘bucket’ against the oncoming columns.
Perhaps the best sign was that when I got back, I immediately started looking up the actual history. I had an enjoyable afternoon falling down the rabbit hole that I had only really glimpsed by Sharpe and similar novels. So perhaps there will be some Napoleonic games on the blog soon, or at least whenever the Creative Regular Opponent is willing to host us.
Liked it? Take a second to support Michael Charge on Patreon!
